
Test Automation has become an integral part of the software development process, allowing teams to increase efficiency, reduce manual errors, and deliver high-quality products at a faster pace. Selenium, a powerful tool for automating web browsers, combined with the versatility of Java, offers a robust framework for building reliable and scalable automated test suites. Using Selenium Java for test automation leverages the strengths of both the tool and the programming language to create effective test scenarios.
Why Selenium?
Selenium is an open-source tool widely used for automating web browsers. It provides a suite of tools for web application testing across different browsers and platforms. Selenium WebDriver, in particular, allows users to control web browsers programmatically, enabling the creation of powerful automated tests using frameworks such as Selenium TestNG.
Here are some reasons why Selenium is a preferred choice for test automation:
- Cross-browser Compatibility: Selenium WebDriver supports multiple browsers, including Chrome, Firefox, Safari, and Edge, ensuring comprehensive test coverage across different environments.
- Language Support: Selenium WebDriver provides compatibility with several programming languages, including Java, Python, C#, and JavaScript. This flexibility allows testers to work with their preferred programming language.
- Rich Ecosystem: Selenium has a vast ecosystem with a thriving community, providing access to numerous resources, plugins, and integrations to enhance the testing process.
- Element Interaction: Selenium provides mechanisms to locate elements on a web page using various strategies such as ID, name, XPath, CSS selectors, etc. This enables testers to interact with specific elements accurately.
- Handling Alerts and Pop-ups: Selenium can handle alerts, pop-ups, and dialog boxes that appear during the testing process, allowing for more comprehensive automation scenarios.
- Dynamic Web Element Handling: Selenium supports handling dynamic elements on web pages, such as those generated by JavaScript frameworks like AngularJS, React, or Vue.js
- Testing Framework Integration: Selenium can be integrated with popular testing frameworks such as JUnit, TestNG, NUnit, and Pytest, providing additional functionalities like reporting, parallel execution, and data parameterization.
- Integration with Continuous Integration (CI) Tools: Selenium can be seamlessly integrated into CI/CD pipelines using tools like Jenkins, Travis CI, or CircleCI, allowing for automated testing as part of the software development lifecycle.
For further insights into Selenium, you can check out its official documentation.
Leveraging Java for Automation
Java is a widely adopted programming language known for its simplicity, robustness, and platform independence. When combined with Selenium, Java empowers testers to build sophisticated automation frameworks with ease. Java automation, using the language’s strong features, enhances the efficiency and effectiveness of test scripts.
Here’s why Java is an excellent choice for Selenium Automation Testing:
- Strong Object-Oriented Paradigm: Java’s object-oriented nature facilitates the creation of modular, maintainable test scripts, making it easier to manage complex test suites.
- Abundance of Libraries and Frameworks: Java boasts a rich ecosystem of libraries and frameworks that complement Selenium, such as TestNG, JUnit, and Apache Maven, enabling seamless integration and advanced test management.
- Platform Independence: Java’s “write once, run anywhere” philosophy ensures that test scripts developed on one platform can be executed on any platform with a Java Virtual Machine (JVM), enhancing portability and scalability.
Prerequisite Steps
In this blog, during the practical, we’ve used below versions for respective libs & applications:
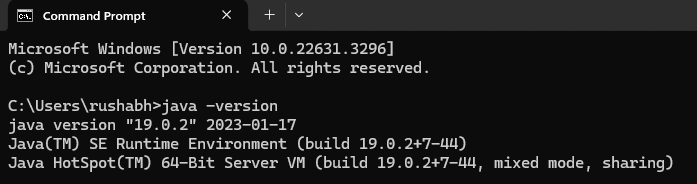
- Java version : 19.0.2
- IntelliJ version : 2023.3.6
- Selenium – Java version : 4.18.1
- TestNG version : 7.9.0
Download and Install JDK:
To write and execute Java programs, you need the Java Development Kit (JDK), which includes the Java Runtime Environment (JRE). The JRE is bundled with the JDK during installation.
Even to run applications dependent on Java, such as IntelliJ IDE, you still require JDK installed.
To get started, Download Java, install it and set the environment path accordingly. You can find guidance on how to configure it on this website. Once configured, you can verify the installation by typing java -version in the command prompt, which displays the installed Java version details.
Install IntelliJ:
To download IntelliJ, visit its official website and choose the .exe file for the community version. The download will commence once the file is selected.
After the download finishes, launch the .exe file and proceed with installing IntelliJ.
You can refer to the instructions provided on this website for guidance on Installing IntelliJ.
Test Case Creation
1. Create a Maven Project in IntelliJ:
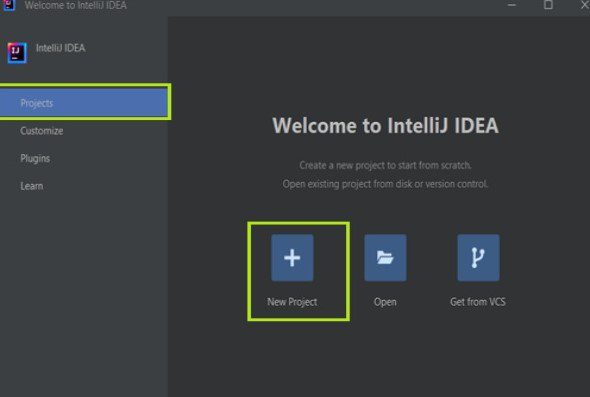
- Launch IntelliJ IDEA and choose “New Project” from the menu.
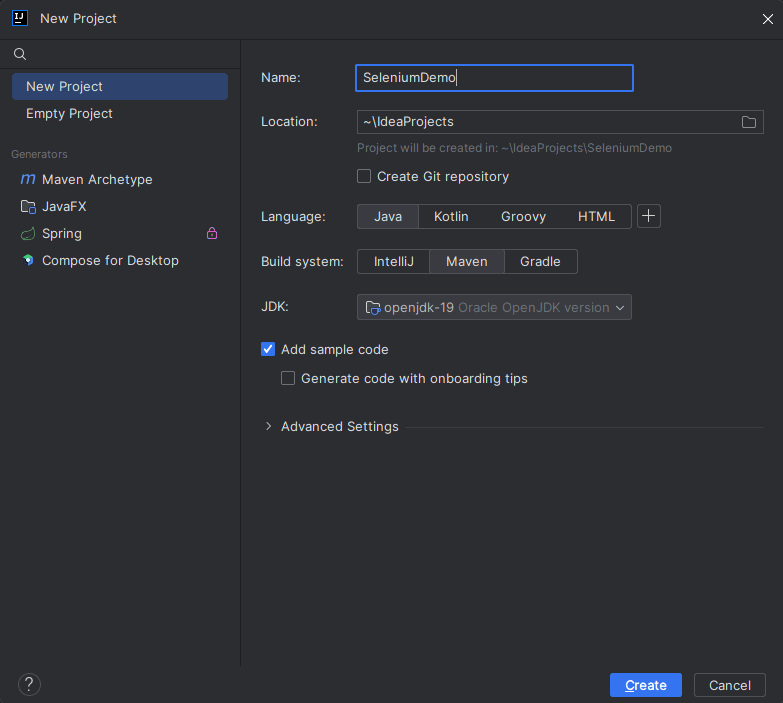
- Specify the project name and location, select Java as the language, choose Maven as the build system, set the JDK version, and finally, click on “Create”.
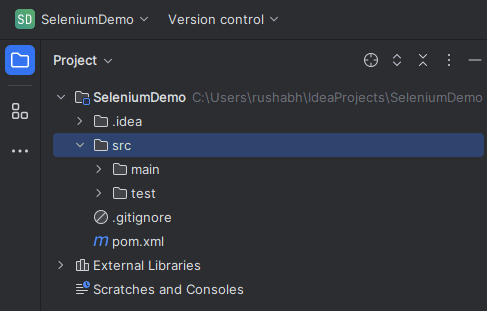
- Ensure your Maven project follows this structure when created.
2. Add Dependencies in pom.xml:
- After creating a new project, the initial step is to include dependencies such as Selenium and TestNG in the pom.xml file. You can find the latest versions of these dependencies on the Maven Repository official website.
<?xml version="1.0" encoding="UTF-8"?>
<project xmlns="http://maven.apache.org/POM/4.0.0"
        xmlns:xsi="http://www.w3.org/2001/XMLSchema-instance"
        xsi:schemaLocation="http://maven.apache.org/POM/4.0.0                                     http://maven.apache.org/xsd/maven-4.0.0.xsd">
   <modelVersion>4.0.0</modelVersion>

   <groupId>org.example</groupId>
   <artifactId>SeleniumDemo</artifactId>
   <version>1.0-SNAPSHOT</version>

   <properties>
       <maven.compiler.source>19</maven.compiler.source>
       <maven.compiler.target>19</maven.compiler.target>
       <project.build.sourceEncoding>UTF-8</project.build.sourceEncoding>
   </properties>

   <dependencies>
       <!-- https://mvnrepository.com/artifact/org.seleniumhq.selenium/selenium-java -->
       <dependency>
           <groupId>org.seleniumhq.selenium</groupId>
           <artifactId>selenium-java</artifactId>
           <version>4.18.1</version>
       </dependency>

       <!-- https://mvnrepository.com/artifact/org.testng/testng -->
       <dependency>
           <groupId>org.testng</groupId>
           <artifactId>testng</artifactId>
           <version>7.9.0</version>
           <scope>test</scope>
       </dependency>
   </dependencies>
</project>
3. Create a Java Test Case with Selenium TestNG
- Next, generate a Java Class name SampleTest within the src > test > java directory.

- Once the Java class is created, begin writing a basic test code with the help of Selenium using TestNG as described below.
import org.openqa.selenium.By;
import org.openqa.selenium.WebDriver;
import org.openqa.selenium.WebElement;
import org.openqa.selenium.chrome.ChromeDriver;
import org.testng.Assert;
import org.testng.annotations.*;

public class SampleTest {

   WebDriver driver;
   String baseUrl = "https://jignect.tech/";

   @BeforeMethod
   public void setUpBrowser() {

       // Initialize ChromeDriver.
       driver = new ChromeDriver();

       // Maximize the browser window size.
       driver.manage().window().maximize();

       // Navigate to the website.
       driver.get(baseUrl);
   }

   @Test
   public void sampleTest() {

       // Ensure that the user is redirected to the homepage of the JigNect Website.
       WebElement textOnHomePage = driver.findElement(By.xpath("//div[contains(text(),'Perfecting Your Software ')]"));
       Assert.assertTrue(textOnHomePage.isDisplayed(), "The user hasn't arrived at the JigNect website's main page.");

       // Navigate to the QA Blogs page by clicking on it from the website's header section.
       WebElement qaBlogsHeaderText = driver.findElement(By.xpath("//div[@id='site-header']//a[contains(text(),'QA Blogs')]"));
       qaBlogsHeaderText.click();

       // Confirm that the user is currently on the QA Blogs page.
       WebElement headerTextFromQaBlogsPage = driver.findElement(By.xpath("//p[contains(text(),'Software Testing')]"));
       Assert.assertTrue(headerTextFromQaBlogsPage.isDisplayed(), "The user hasn't arrived at the QA Blogs page.");
   }

   @AfterMethod
   public void closeBrowser() {

       // Terminate the browser.
       driver.quit();
   }
}
- This test script utilises TestNG annotations to perform automated testing on the JigNect website. Here’s a brief explanation of each TestNG annotation used :
- @BeforeMethod: The setUpBrowser method is annotated with @BeforeMethod, indicating that it should run before each test method. In this case, it initialises the ChromeDriver, maximises the browser window, and navigates to the specified URL.
- @Test : This annotation marks a method as a test method. The sampleTest() method is the actual test case in this script. It verifies that the user is redirected to the homepage of the JigNect website, clicks on the QA Blogs page link, and confirms that the user is on the QA Blogs page.
- @AfterMethod: The closeBrowser method is annotated with @AfterMethod, indicating that it should run after each test method. In this case, it closes the browser after the test execution is complete.
- If you’re interested in learning more about TestNG, visit its official website for additional information.
- Overall, this test script ensures that the website navigation and page redirection work as expected, using assertions to validate the expected outcomes at each step.
Run the created Test Case and check the result
1. Once the test script is written, proceed to execute the test and carefully analyse the results.
- To run the test case, go to the test class, right-click on it, and choose the “Run” option. The results will be displayed in IntelliJ’s Run tool window.

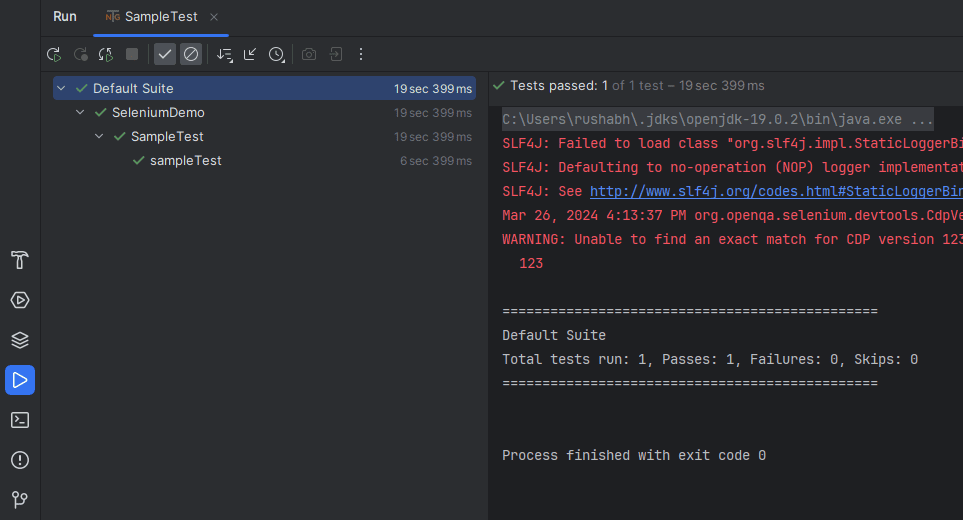
2. Test Run Results
- The results shown in IntelliJ’s Run tool window provide important information about the test run.
- As you can see, the test we created has passed and is functioning correctly as anticipated.
- By reviewing these results, we can understand which tests passed, failed, or were skipped.
- This helps us improve our testing process and make our scripts better and more precise.
Conclusion
Selenium remains a key tool for automating web application testing, offering features like cross-browser testing, multi-language support, extensibility, parallel test execution, and strong community backing. While popular for delivering quality software, Selenium has limitations like setup complexity, test flakiness, limited non-web technology support, and maintenance requirements. By understanding both its strengths and shortcomings, teams can leverage Selenium effectively to achieve their testing goals and deliver exceptional user experiences.
In conclusion, we’ve gained a solid understanding of Selenium and its fundamentals through practical examples showcased on our blog. These hands-on experiences have allowed us to grasp Selenium’s concepts more accurately and effectively. Additionally, Selenium emerges as the preferred choice for automation testing due to its robust capabilities and versatility. In future blog posts, we’ll write about Selenium advance topics covering dynamic frameworks, page object classes, data factories, handling authentication, iframes, element strategies, wait stratergies and more.
Stay connected with us to explore additional topics related to Automation Testing, such as implementing dynamic frameworks, using page object classes, data factories, data objects, and much more in our upcoming blog posts.
Keep practising and exploring to master these powerful tools further with Jignect.
Witness how our meticulous approach and cutting-edge solutions elevated quality and performance to new heights. Begin your journey into the world of software testing excellence. To know more refer to Tools & Technologies & QA Services.
If you would like to learn more about the awesome services we provide, be sure to reach out.
Happy Testing 🙂


