
Introduction to Specflow
SpecFlow is a Behavior-Driven Development (BDD) framework specifically designed for the .NET ecosystem. It helps bridge the communication gap between business stakeholders and technical teams by allowing the creation of executable specifications in a natural language format. This approach ensures that everyone involved in the development process, from product managers to developers and testers, has a clear and shared understanding of the software requirements.
What is BDD all about?
Behavior-Driven Development (BDD) is a collaborative approach to software development that enhances communication between developers, testers, and business stakeholders. BDD focuses on writing clear and concise scenarios in plain language, describing the expected behavior of the application. SpecFlow is a popular BDD framework for .NET, enabling teams to write these scenarios using Gherkin syntax and integrate them seamlessly with C#. By combining Selenium for browser automation with SpecFlow for scenario management, teams can ensure their web applications meet business requirements and perform reliably. This integration streamlines the testing process, making it more efficient and effective.
➡️ To understand the BDD more, refer to our blog
https://jignect.tech/understanding-the-bdd-gherkin-language-main-rules-for-bdd-ui-scenarios/
Why use SpecFlow?
SpecFlow is valuable for teams looking to enhance collaboration, improve test coverage, ensure readability and maintainability of tests, seamlessly integrate BDD into their workflows, promote code reuse, and leverage robust tooling support within the .NET ecosystem. These benefits collectively contribute to more efficient development processes and higher-quality software products.
Improved Collaboration:
SpecFlow facilitates improved collaboration among business stakeholders, developers, and testers by providing a common language. Using Gherkin syntax, which is business-readable, ensures that everyone involved has a clear understanding of the application’s requirements and test scenarios.
Enhanced Test Coverage:
SpecFlow promotes writing tests as executable specifications. This approach guarantees that all user scenarios are covered in the testing process, resulting in more thorough testing and higher software quality.
Readability and Maintainability:
Tests written in Gherkin are highly readable and understandable, even for non-technical stakeholders. This readability makes it easier to maintain and update tests as the application evolves.
Seamless Integration:
SpecFlow seamlessly integrates with the .NET platform and popular test frameworks such as NUnit, xUnit, and MSTest. This integration makes it straightforward to incorporate Behavior-Driven Development (BDD) practices into your existing development workflow and CI/CD pipelines.
Reusable Step Definitions:
SpecFlow promotes reusability through its step definitions, which can be shared across multiple scenarios and feature files. This promotes code reuse, reduces duplication of effort, and helps maintain consistency across tests.
Excellent Tooling Support:
SpecFlow provides comprehensive tooling support within Visual Studio, including syntax highlighting, auto-completion, and the ability to generate step definitions automatically. This enhances developer productivity and ensures consistency in test implementation.
For further insights into Specflow, you can check out its official documentation.
Prerequisites Steps
In this blog, during the practical, we’ve used the below versions for respective libs & applications:
- Visual Studio: Visual Studio 2022 version 17.10.3
- .NET SDK: 17.10
- Specflow: 3.9.74
Setting Up the Environment
- Install Visual Studio
- Download: Visit the Visual Studio download page.
- Run the Installer: Select the “.NET desktop development” workload.
- Install .NET SDK
- Download: Visit the .NET SDK download page.
- Run the Installer: Follow the instructions.
- Install SpecFlow Extension
- Open Visual Studio.
- Navigate to Extensions: Go to Extensions > Manage Extensions.
- Search and Install: Find “SpecFlow” and install the SpecFlow for Visual Studio extension. Restart Visual Studio if prompted.
Creating a SpecFlow Project
- Create a New Project
- Open Visual Studio.
- New Project: Go to File > New > Project.
- Select Project Type: Choose Class Library (.NET Core) or Console App (.NET Core).
- Configure the Project: Name it and choose a location.
- Add SpecFlow to the Project
- Open NuGet Package Manager: Right-click on your project in Solution Explorer and select Manage NuGet Packages.
- Install Packages: Search and install SpecFlow.NUnit, NUnit3TestAdapter, and Microsoft.NET.Test.Sdk.
Writing Your First Feature File
1️⃣Create a Feature File
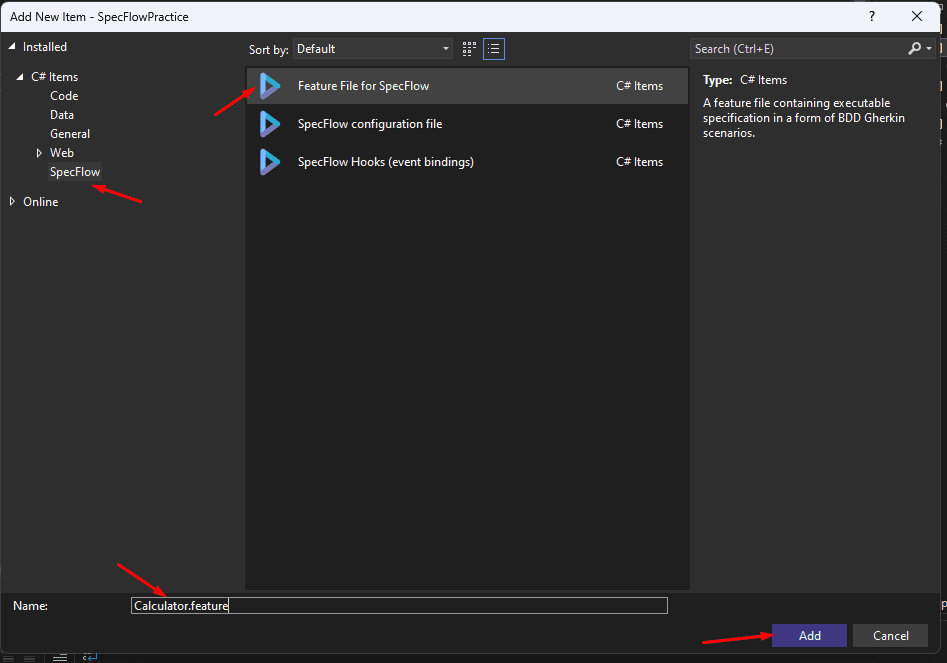
- Add New Item: Right-click on your project in Solution Explorer, and select Add > New Item.
- SpecFlow Feature File: Name it `Calculator.feature`.
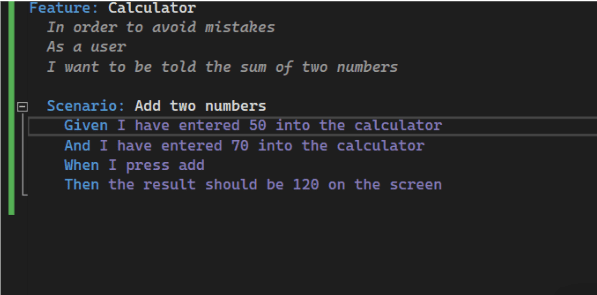
2️⃣Define a Feature
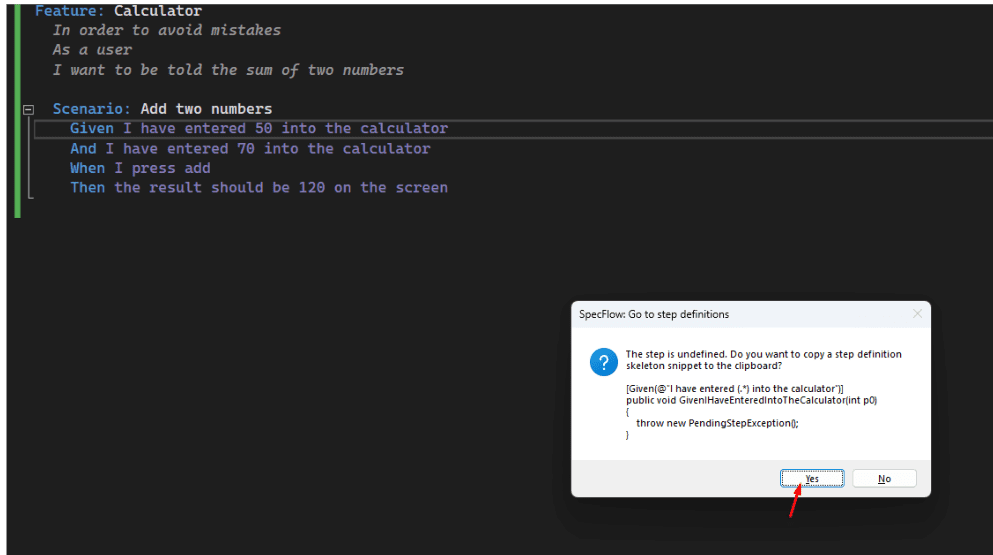
- Write Gherkin Syntax: Open `Calculator.feature` and write:
Implementing Step Definitions
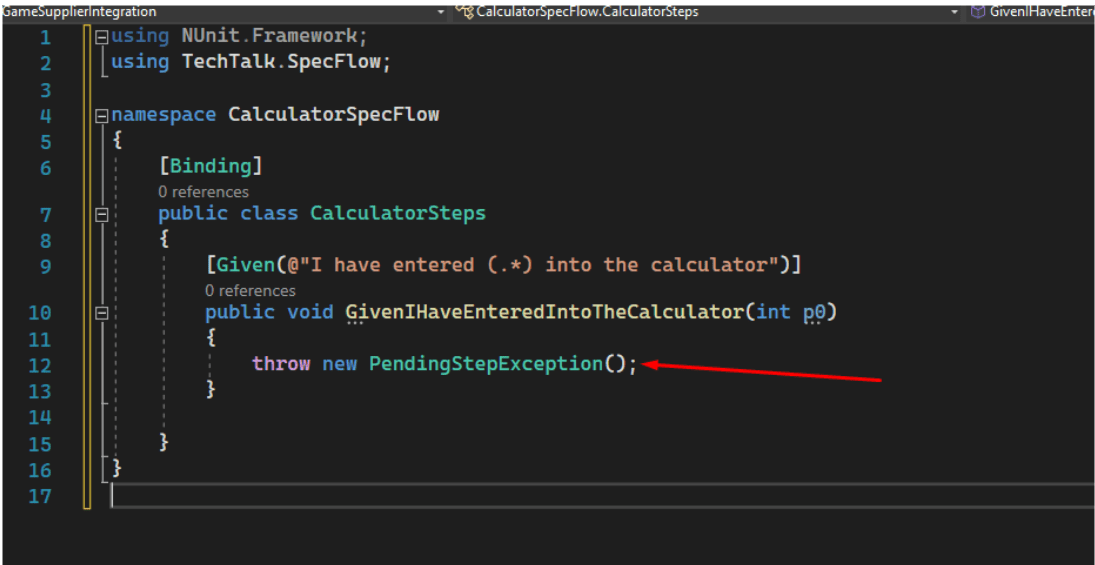
1️⃣Create & Implement Step Definitions
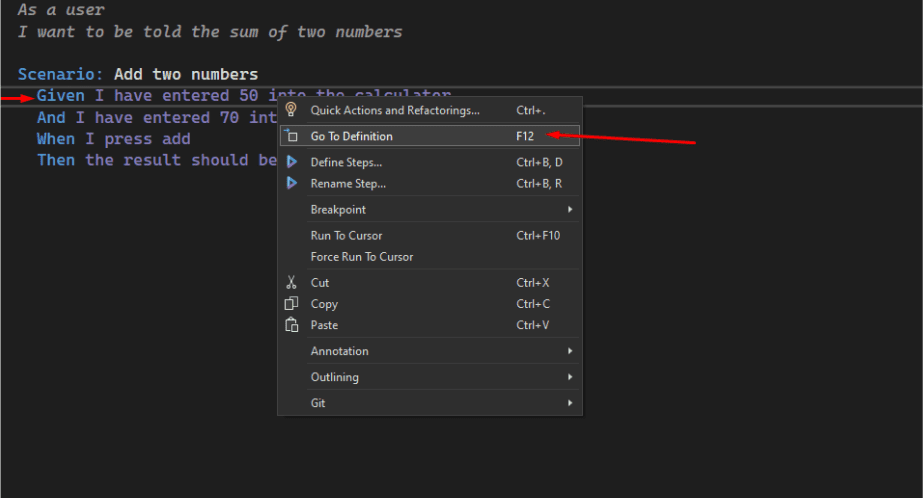
- Step Definition Class: Name the file `CalculatorSteps.cs`.
- Generate Step Definitions: Right-click on any step in your feature file, select “Go To Definition”, and click “Yes”.
2️⃣Implemented all the Steps:

Given Step:
- This step initializes the Chrome browser using ChromeDriver and includes a placeholder for logic to enter a number into the calculator. The step matches the Gherkin syntax for entering a number into the calculator.
When Step:
- This step contains a placeholder for logic to simulate pressing the “add” button on the calculator. It matches the Gherkin syntax for pressing the add button.
Then Step:
- This step asserts that the result displayed on the screen matches the expected result. The Assert.AreEqual method is used to compare the expected result with the actual result. After the assertion, the browser is closed using driver.Quit().
Running the Tests
- Build the Solution: Go to Build > Build Solution or press `Ctrl+Shift+B`.
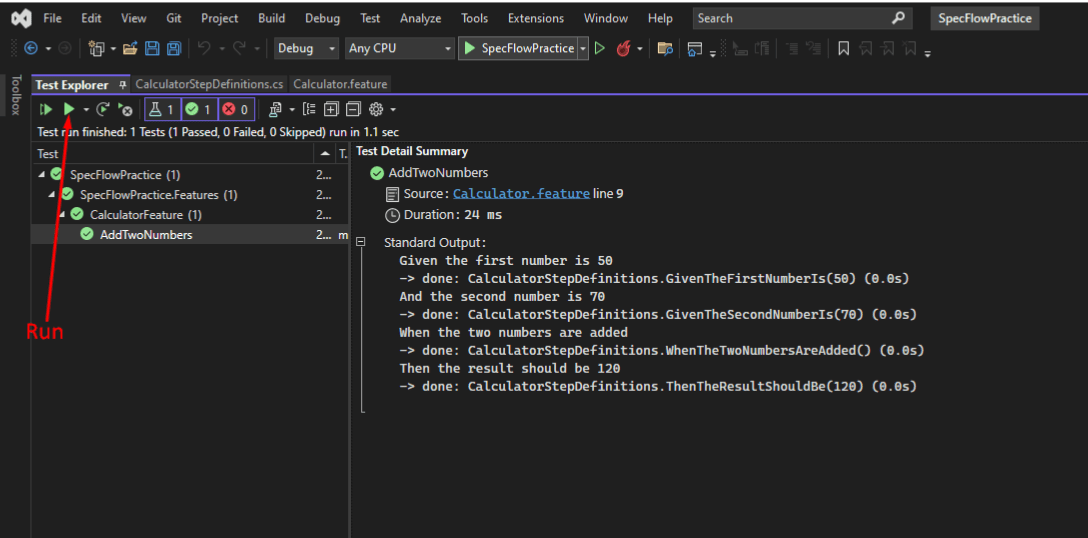
- Run the Tests: Open Test Explorer from Test > Test Explorer, select your scenario, and click the run icon or “Run All” to execute your tests.
Conclusion
Integrating SpecFlow with Selenium for BDD testing is a game-changer for web application test automation. This synergy enhances how teams handle testing and collaboration. SpecFlow’s Gherkin syntax ensures clarity and involvement from developers to non-technical stakeholders, fostering a unified understanding of requirements and test scenarios. Structured test writing with SpecFlow results in tests that are both readable and maintainable, while reusable step definitions reduce redundancy. Incorporating SpecFlow and Selenium into your CI pipeline facilitates regular automated testing, allowing early issue detection during development.
However, there are challenges such as setup complexity, slower test execution speeds on real browsers, and maintenance overheads as the application evolves. Ensuring consistent test execution across various browsers and addressing test flakiness due to timing issues, UI changes, or environmental factors can also be difficult and require additional effort.
Keep practising and exploring to master these powerful tools further with Jignect.
Witness how our meticulous approach and cutting-edge solutions elevated quality and performance to new heights. Begin your journey into the world of software testing excellence. To know more refer to Tools & Technologies & QA Services.
If you would like to learn more about the awesome services we provide, be sure to reach out.
Happy Testing 🙂


