Automation testing is key for reliable software. Selenium, a leading open-source tool, is essential for web automation testing. Combined with C#, it helps QA professionals to build efficient, scalable test automation frameworks. Selenium simulates user interactions to test web applications across different browsers. Its intuitive APIs make creating and running automated tests simple, speeding up feedback and improving software quality.
Using Selenium with C# leverages C#’s strong typing and object-oriented features, providing a solid foundation for creating advanced test scripts and frameworks.
This blog series will offer practical insights, best practices, and examples for using Selenium and C# in automated testing. Whether you’re a seasoned QA engineer or new to test automation, this series will help you master testing with Selenium and C#.
Why Selenium with C#?
Selenium is widely recognized for its effectiveness in automating web browsers, offering a robust framework for creating dependable and scalable automated test suites. It boasts compatibility across various browsers like Chrome, Firefox, Safari, and Edge, ensuring consistent testing experiences across different platforms. As an open-source tool, Selenium provides cost-effective solutions for test automation, making it accessible to developers and organizations of all sizes. Furthermore, its support for multiple programming languages such as Java, Python, C#, Ruby, and JavaScript offer testers the flexibility to work with their preferred language. By automating repetitive tasks like form filling, clicking buttons, and navigating web pages, Selenium empowers testers to streamline their testing processes and improve overall efficiency.
Main Features of Selenium
- Strongly Typed Language: C# is a statically typed language, providing compile-time type checking that helps catch errors early in the development process. This feature enhances code reliability and reduces the likelihood of runtime errors during test execution.
- .NET Framework Integration: C# seamlessly integrates with the .NET framework, offering access to a vast ecosystem of libraries and tools for various purposes, including web automation. Developers can leverage built-in functionalities for file operations, data manipulation, and more, streamlining test script development and enhancing productivity.
- Object-Oriented Programming (OOP) Paradigm: C# supports object-oriented programming principles, enabling developers to create reusable and modular code structures. With concepts such as classes, inheritance, and polymorphism, automation frameworks built with C# can be designed to be scalable, maintainable, and extensible.
- Asynchronous Programming Support: Asynchronous programming is crucial for efficient web automation, especially when dealing with network-bound operations like HTTP requests. C# provides robust support for asynchronous programming with features like async/await, allowing developers to write non-blocking code that improves performance and responsiveness.
- Rich Standard Library: C# comes with a rich standard library that provides comprehensive support for various tasks, including web automation. Classes like HttpClient for making HTTP requests, WebDriver for interacting with web browsers, and Json.NET for handling JSON data simplify automation tasks and reduce the need for external dependencies.
- Cross-Platform Compatibility: With the introduction of .NET Core and the latest .NET 5 and later versions, C# has become more cross-platform compatible. Developers can write automation scripts using C# and run them on different operating systems, including Windows, macOS, and Linux, enhancing flexibility and scalability.
- Versatility: C# enables automation across diverse platforms, including web, desktop, and mobile applications, meeting various automation needs efficiently.
- Community and support: With a vibrant developer community, C# offers access to a wealth of resources like forums, tutorials, and documentation, facilitating smoother automation development.
- Visual Studio integration: Integrated with Visual Studio, C# provides a robust IDE for writing, debugging, and testing automation scripts seamlessly within a single environment.
Prerequisite Steps
Throughout this blog, the following versions of libraries and applications were used in our practical examples.
- Visual Studio 2022 [Version 17.9.5]
- MSTest.TestFramework [Version 3.1.1]
- Selenium.Webdriver [Version 4.20.0]
Download and Install C# IDE (Visual Studio):
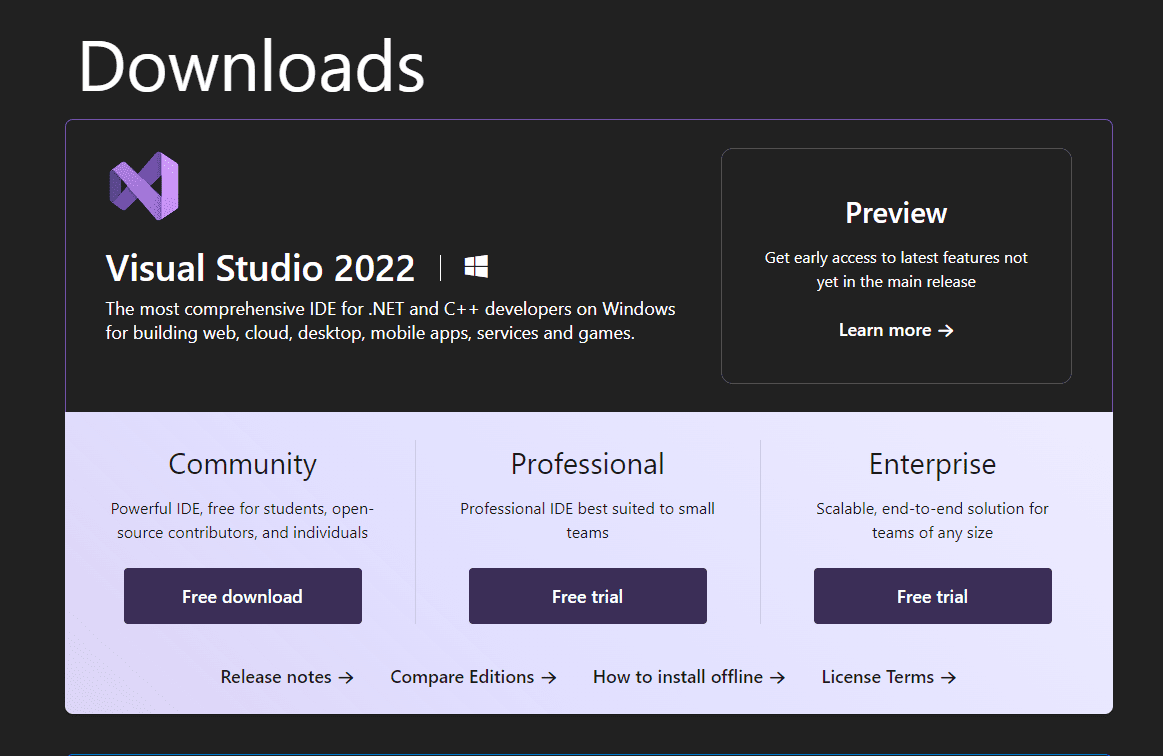
To download the latest version of Visual Studio for Windows platform, refer to the below link: https://visualStudio.microsoft.com/downloads/
- Download the community version, Click on the download button.
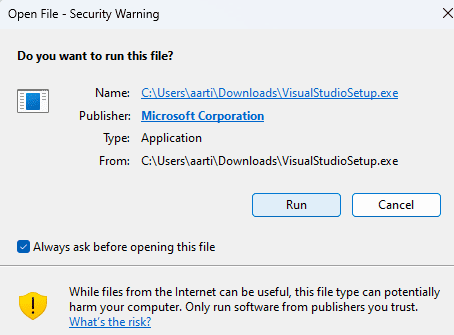
- Once the download is complete, locate the downloaded installer file (usually named vs_[edition]_installer.exe) in your Downloads folder or the location where your browser saves downloads.
- Double-click the installer file to run it. This will launch the Visual Studio Installer.
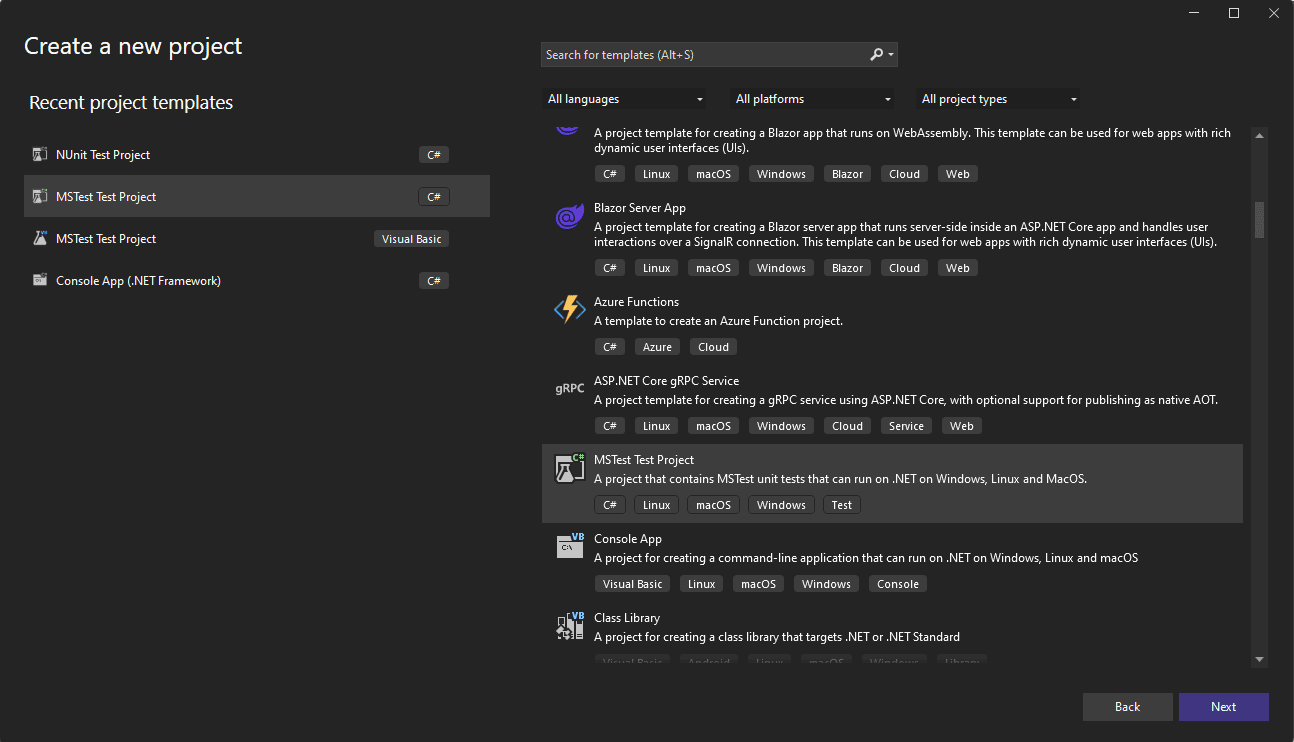
Create a MSTest Project in Visual Studio:
- Open Visual Studio and create a new project by selecting “File” > “New” > “Project…”.

- Choose “MSTest.Test Project” , “Console App (.NET Framework)” Or “Console App (.NET Core)” based on your preference and project requirements.
- Install NuGet packages in project dependencies as below,
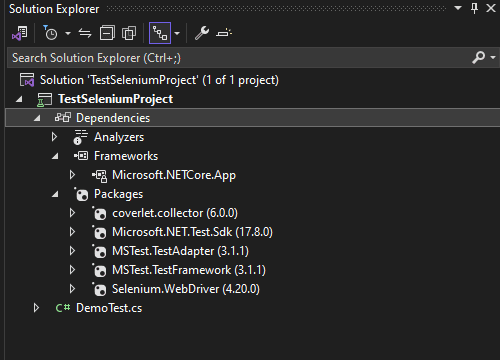
Install Selenium WebDriver Package:
- In Visual Studio, you can access the “Manage NuGet Packages” option by right-clicking on your project in the Solution Explorer.
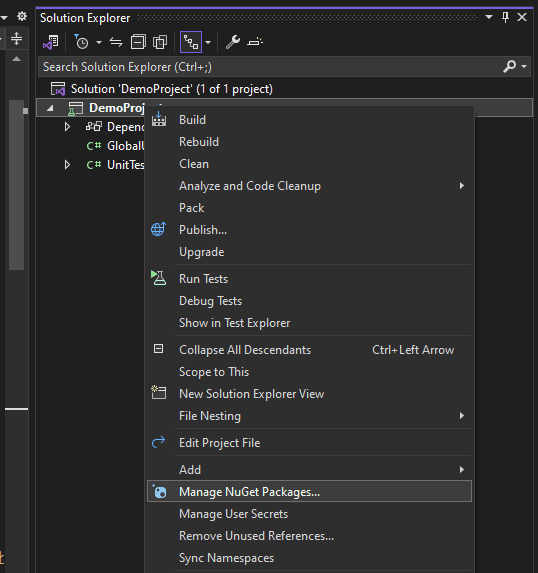
- Search for “Selenium.WebDriver” and install the package.
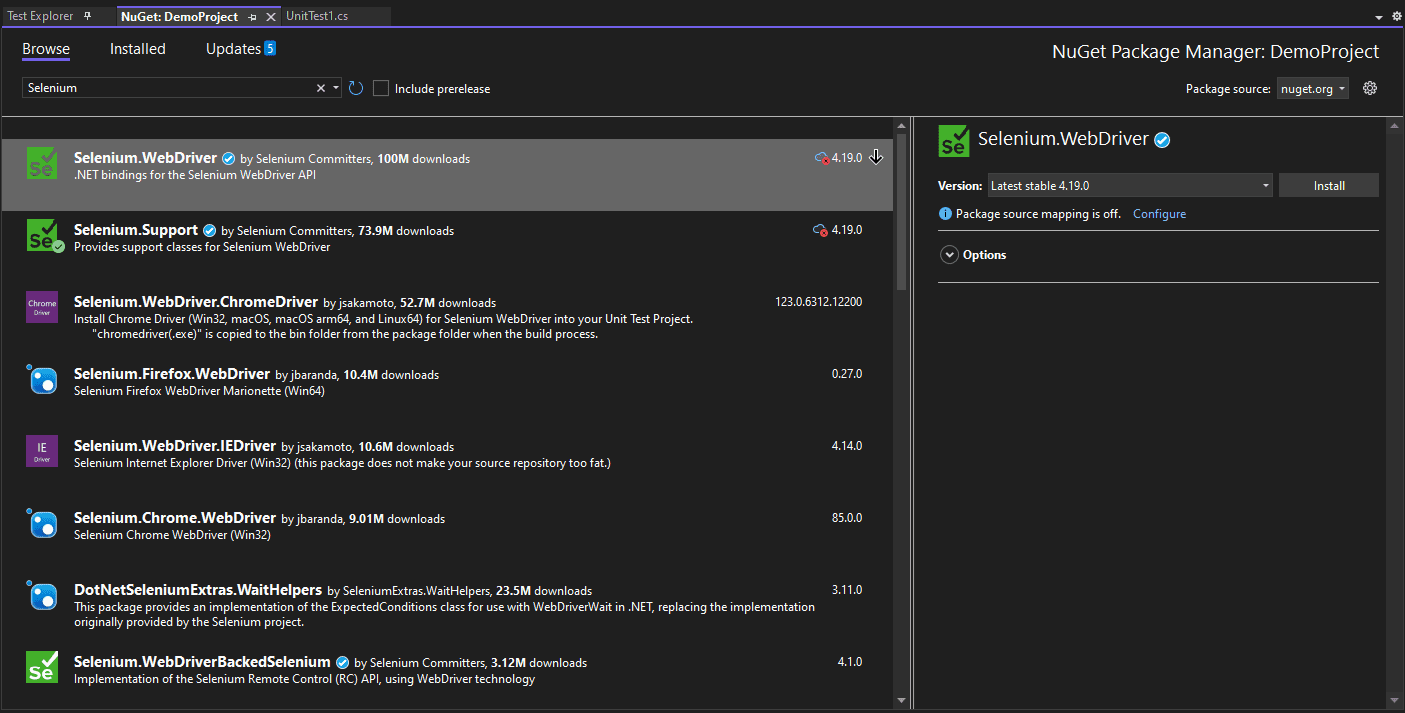
Install WebDriver:
- Download the WebDriver executable for the browser you want to automate (e.g ChromeDriver for Google Chrome) and place it in your project directory.Click on the ‘Install’.
- Alternatively, you can install WebDriver using NuGet packages (e.g., Selenium.WebDriver.ChromeDriver).
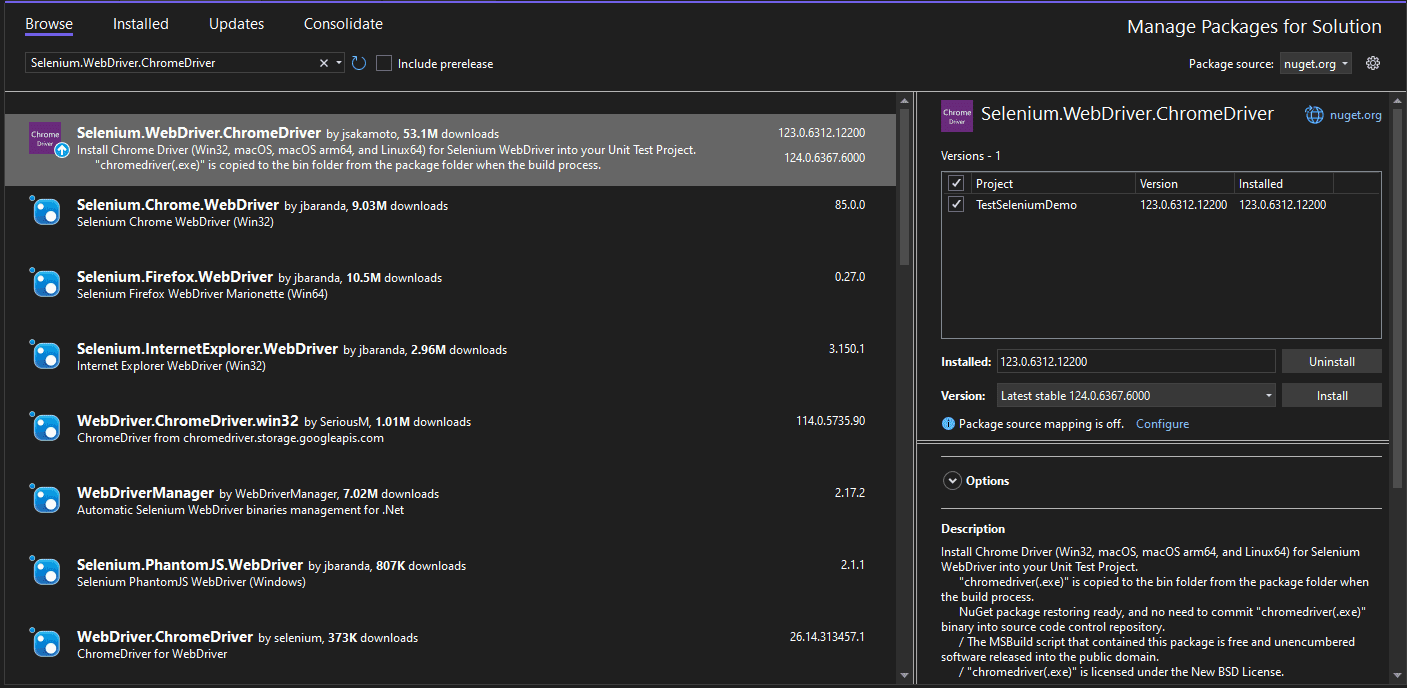
In the MSTest framework for Selenium C#, annotations like those found in TestNG (Java) or NUnit (C#) are not present. Instead, attributes provided by the MSTest framework are employed to annotate test methods and furnish supplementary configuration. Here are the principal attributes utilised in MSTest for Selenium C#:
Attributes of MsTest Unit Testing Framework
Annotations are special markers that provide metadata about methods, classes, or properties. They are used to define the behavior of test methods, setup methods, and teardown methods in automated test scripts. Annotations in Selenium with C# help in organizing and controlling the execution flow of test cases.
Here are some commonly used annotations in Selenium with C#:
- [TestMethod]:
- Marks a method as a test method that should be executed by the testing framework.
- Used to identify the methods that contain test logic.
- [TestInitialize]:
- Marks a method to be executed before each test method is run.
- Used for setup tasks such as initializing test data or launching the browser.
- [TestCleanup]:
- Marks a method to be executed after each test method is run.
- Used for cleanup tasks such as closing the browser or releasing resources.
- [ClassInitialize]:
- Marks a method to be executed once before any test methods in the test class are run.
- Used for setup tasks that need to be performed only once for the entire test class.
- [ClassCleanup]:
- Marks a method to be executed once after all test methods in the test class have been run.
- Used for cleanup tasks that need to be performed only once for the entire test class.
- [TestCategory]:
- Assigns a category to a test method, allowing for logical grouping and filtering of tests.
- Used for organizing tests based on different criteria (e.g., functional area, priority).
- [Ignore]:
- Marks a test method to be ignored or skipped during test execution.
- Used when a test method is not ready to be executed or is temporarily disabled.
- [DataRow]:
- Marks a test method to be executed multiple times with different sets of data.
- Used for data-driven testing, where the same test logic is executed with different input data.
Creating C# Class and Automated Tests with Selenium
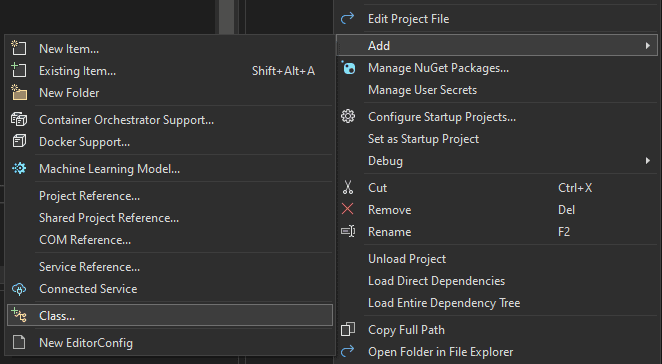
- Right-click on your project in Solution Explorer.
- Select “Add” > “Class”.
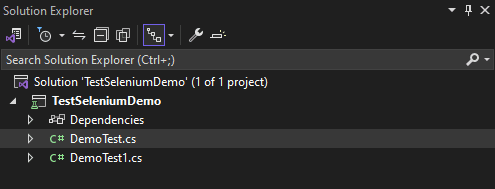
- Name your class appropriately (e.g., DemoTest.cs, DemoTest1.cs) and click “Add”.
Once the class is created, begin writing a basic test code with the help of Selenium using C# as described below.
using OpenQA.Selenium;
using OpenQA.Selenium.Chrome;
using OpenQA.Selenium.Interactions;

namespace TestSeleniumDemo
{
    [TestClass]
    public class DemoTest
    {
        IWebDriver driver;

        [TestInitialize]
        public void Setup()
        {
            //Driver initialization
            driver = new ChromeDriver();
        }

        [TestMethod]
        public void ContactUsTest()
        {
            //Navigate to URL
            driver.Navigate().GoToUrl("https://jignect.tech/");

            //Maximize the browser window
            driver.Manage().Window.Maximize();

            //Identify the 'Contact Us' button
            var contactUsButton = driver.FindElement(By.XPath("//ul[@id='menu-main-menu']//a[contains(text(),'Contact Us')]"));
            //Click on the 'Contact Us' button
            contactUsButton.Click();

            //Identify the 'Submit' button
            var submitButton = driver.FindElement(By.XPath("//p//input[@type='submit']"));
            //Click on the submit button
            submitButton.Click();

            //Identify the 'Validation' message
            var errorMessage = driver.FindElement(By.XPath("//div[contains(@class,'response-output')]"));
            Actions actions = new(driver);

            // Check if the element is displayed
            if (errorMessage.Displayed)
            {
                actions.SendKeys(Keys.PageDown).Perform();
            }
            string actualMessage = errorMessage.Text;
            string expectedMessage = "One or more fields have an error. Please check and try again.";
            Assert.AreEqual(expectedMessage, actualMessage, "Error message isn't matched");

            //close the browser
            driver.Close();
        }
    }
}
Let’s dive into a detailed explanation of each part of the test implementation:
- Setup Method ([TestInitialize]):
- This method is a part of the MSTest framework and is executed before each test method.
- It initializes the WebDriver (driver) instance. In this case, we’re using ChromeDriver for browser automation.
- ContactUsTest Method ([TestMethod]):
- This is the main test method where the actual testing logic resides.
- Navigation:
- driver.Navigate().GoToUrl(“https://jignect.tech/”): Navigates the browser to the specified URL, which is the homepage of the website under test.
- Maximize Window:
- driver.Manage().Window.Maximize(): Maximizes the browser window to ensure that elements are fully visible and accessible.
- Finding and Interacting with Elements:
- We use XPath locators to find various elements on the webpage:
- contactUsButton, submitButton: These variables represent different elements such as buttons, text areas, and input fields on the contact form.
- We interact with these elements using methods like Click() to simulate button clicks.
- We use XPath locators to find various elements on the webpage:
- Scroll the Page:
Actionsclass: This allows for simulating keyboard actions, such as pressing keys or scrolling the page.SendKeys(Keys.PageDown): This command simulates pressing the ‘Page Down’ key, which scrolls the page down.Perform(): Executes the action of sending the key press.- The code checks if the error message is displayed, and if so, it scrolls down the page.
- Validate the Error Message:
errorMessage.Text: Retrieves the text of the error message.Assert.AreEqual(): This is an assertion to verify if the actual error message matches the expected one.expectedMessage: The expected error message is"One or more fields have an error. Please check and try again."- .If the messages do not match, the test will fail and display the custom error message
"Error message isn't matched"
- Browser Closure:
- Finally, driver.Close() closes the browser window after the test execution is complete, ensuring proper cleanup.
- contactUsButton, submitButton: These variables represent different elements such as buttons, text areas, and input fields on the contact form.
This test automates the process of filling out a contact form, submitting it, and verifying that the correct “Thank You” message is displayed afterward. It demonstrates the typical workflow of a Selenium test, including navigation, interaction with elements, assertion, and cleanup.
Execute the Test Case and Observe the Result
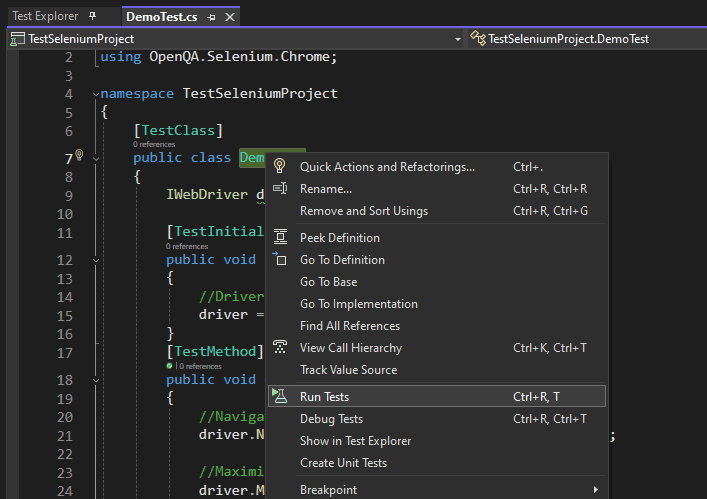
- Once the test script is ready, execute it and check the outcomes. Right-click the test class, choose “Run,” and view the results in Visual Studio’s Run tool window.
Test Run Outcome Analysis:
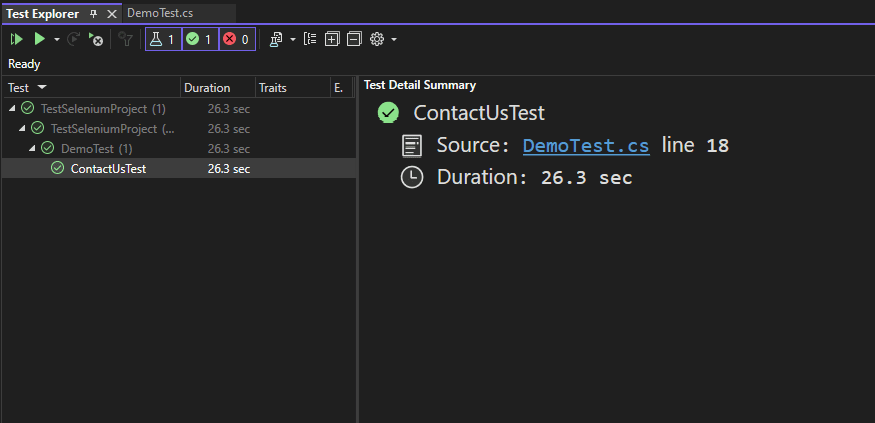
The outcomes exhibited within Visual’s Run tool window furnish crucial insights regarding the test execution.
Observing the results, it is evident that the constructed test has successfully passed and operates in accordance with expectations.
Through meticulous scrutiny of these outcomes, we can discern the tests that succeeded, encountered failure, or were intentionally omitted.
Such analysis serves to refine our testing methodologies, facilitating enhancements to our scripts’ accuracy and precision.
Conclusion
In conclusion, this blog offers a clear guide on using C# and Selenium for web automation testing. It highlights the importance of automated testing for software quality assurance and explains how combining Selenium with C# can create efficient and scalable test frameworks.
Key Highlights:
- Reasons to choose Selenium: cross-browser compatibility, cost-effectiveness, and multi-language support.
- Benefits of using C#: versatility, strong typing, and .NET integration.
- Steps for setting up a C# IDE and creating MSTest projects in Visual Studio.
- Instructions for installing Selenium WebDriver and browser-specific drivers.
- Sample test script demonstrating Selenium workflows like navigation, interaction, assertion, and browser management.
This blog provides practical knowledge and examples to help QA engineers and developers effectively use Selenium and C# for web automation testing.
Keep practising and exploring to master these powerful tools further with Jignect.
Witness how our meticulous approach and cutting-edge solutions elevated quality and performance to new heights. Begin your journey into the world of software testing excellence. To know more refer to Tools & Technologies & QA Services.
If you would like to learn more about the awesome services we provide, be sure to reach out.
Happy Testing 🙂


