

In the dynamic world of software testing, ensuring that applications meet both functional and non-functional requirements is crucial. Quality Assurance (QA) professionals are always on the lookout for tools and methodologies that can streamline testing processes, enhance collaboration, and ensure comprehensive coverage. Enter WebdriverIO and Cucumber BDD two powerful tools that, when combined, revolutionize the approach to test automation. WebdriverIO provides a robust framework for automating web applications, while Cucumber BDD promotes writing tests in a natural, business-readable language. This synergy not only bridges the communication gap between technical and non-technical team members but also ensures that tests are aligned with business goals, leading to higher quality software. In this blog, we will explore how integrating WebdriverIO with Cucumber BDD can elevate your QA efforts, making testing more efficient, effective, and collaborative.
What is BDD?
Behavior Driven Development (BDD) is an extension of Test Driven Development (TDD) that focuses on improving communication between team members and ensuring that software development aligns with business objectives. BDD encourages writing tests in a language that non-programmers can read, typically using Gherkin syntax. This approach makes test scenarios understandable to all stakeholders, including developers, QA professionals, and business analysts. By concentrating on the behavior of the application from the end-user’s perspective, BDD helps teams to write clear and concise tests that are directly tied to user requirements. For more details, read our blog on Understanding the BDD, Gherkin Language & Main Rules for BDD UI Scenarios
Integrating BDD with tools like WebdriverIO and Cucumber offers several advantages:
- Enhanced Collaboration: BDD fosters better communication and collaboration among team members, ensuring that everyone has a shared understanding of the requirements.
- Clear Requirements: By defining requirements as executable specifications, BDD helps prevent misunderstandings and ambiguities in the development process.
- Early Detection of Issues: BDD facilitates the early identification and resolution of issues, reducing the cost and effort required to fix defects later in the development cycle.
- Focused on Business Value: BDD ensures that development efforts are aligned with business goals, delivering features that provide real value to users.
- Higher Test Coverage: BDD promotes comprehensive testing by encouraging the definition of clear and complete acceptance criteria for each feature.
By combining WebdriverIO’s powerful automation capabilities with Cucumber’s BDD approach, QA teams can create robust, maintainable, and scalable test suites that ensure the delivery of high-quality software.
What is Cucumber?
Cucumber is a popular open-source tool for Behavior Driven Development (BDD) that allows developers and testers to write tests in a natural language that is easy to read and understand. These tests are written in Gherkin, a domain-specific language that uses plain English to describe the behavior of an application.
Key Features of Cucumber:
1️⃣Readable Tests
Cucumber enables writing test scenarios in a human-readable format, making it accessible to all team members, including non-technical stakeholders. This fosters better communication and collaboration within the team.
2️⃣Gherkin Syntax
Gherkin syntax uses simple keywords such as Given, When, Then, And, and But to define test scenarios. This structured approach ensures clarity and consistency in how tests are written and understood.
[Example]
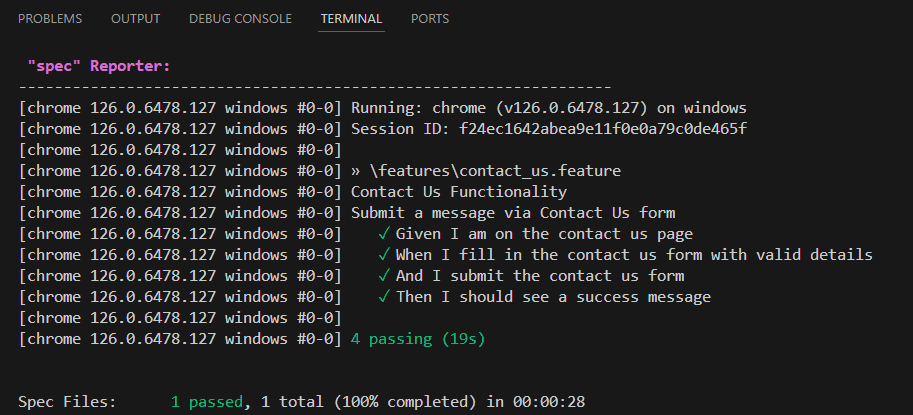
Feature: Contact Us Functionality

  Scenario: Submit a message via Contact Us form
    Given I am on the contact us page
    When I fill in the contact us form with valid details
    And I submit the contact us form
    Then I should see a success message
3️⃣Living Documentation
Cucumber tests serve as living documentation of the application’s behavior. As these tests are written in plain language, they remain up-to-date with the application’s functionality and provide a clear understanding of what the software does.
4️⃣Executable Specifications
Each Gherkin scenario corresponds to automated test steps defined in the code. This ensures that the specifications are always executable, allowing for continuous validation of the application’s behavior.
5️⃣Integration with Automation Testing Frameworks
Cucumber can be integrated with various automation frameworks, such as WebdriverIO, to automate the execution of test scenarios. This integration streamlines the process of running tests and verifying that the application behaves as expected.
6️⃣Support for Multiple Languages
Cucumber supports multiple programming languages, including JavaScript, Java, Ruby, and Python, making it versatile and adaptable to different technology stacks.
Why Use Cucumber?
- Improved Collaboration: Cucumber’s plain language approach bridges the gap between technical and non-technical team members, ensuring everyone has a shared understanding of the requirements.
- Enhanced Clarity: Writing tests in Gherkin syntax ensures that scenarios are clear and unambiguous, reducing misunderstandings and errors.
- Comprehensive Testing: Cucumber encourages defining complete acceptance criteria for each feature, leading to higher test coverage and more reliable software.
- Continuous Validation: Automated Cucumber tests provide continuous feedback on the application’s behavior, helping to catch issues early and ensuring that new changes do not introduce regressions.
In summary, Cucumber is a powerful tool for implementing BDD, allowing teams to write clear, readable, and executable tests that enhance collaboration and ensure high-quality software.
Prerequisite steps:
Before diving into the implementation, ensure you have the following prerequisites:
- Visual Studio Code: Version 1.90
- Node.js: Version 20.13.1
Here’s a detailed guide with descriptions for each command:
Setting Up Your Environment
- Download Visual studio code (VS Code) from its official site and install it.
- Install Node.js: Ensure you have Node.js installed on your machine. You can download it from Node.js.
Create a New Project Directory
- Begin by creating a new directory for your project and navigating into it. You can use the following commands for that: “mkdir wdio-js-project” and “cd wdio-js-project”.
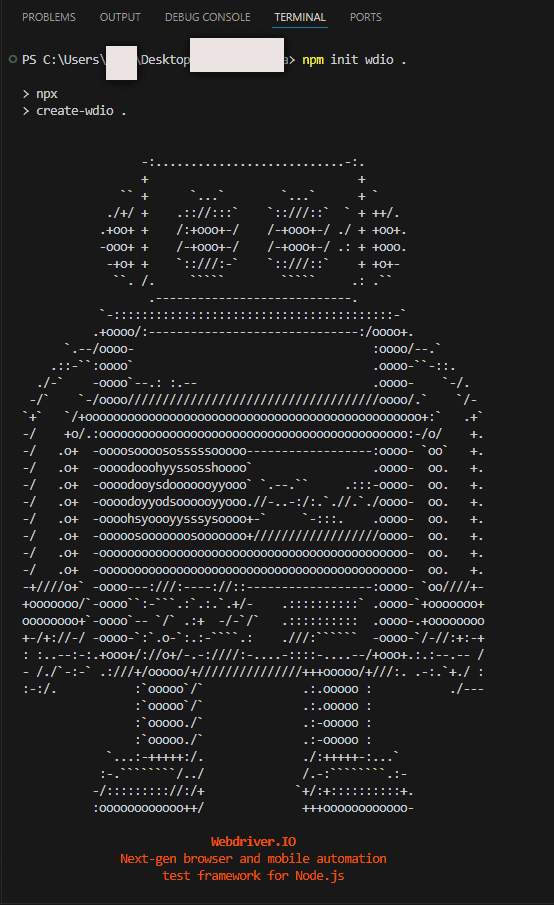
- To initialize a WebdriverIO project, hit this command in your project directory terminal: ”npm init wdio@latest .”
- if you want to create a new project in a specific directory, you can use: “npm init wdio@latest ./path/to/new/project”
Initialize the Project
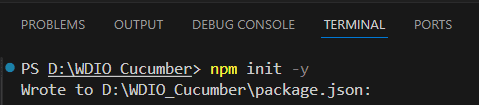
- Initialize a new Node.js project to hit this command ‘npm init -y’ in the terminal.
- This command creates a ‘package.json’ file with default settings.
Install WebdriverIO CLI
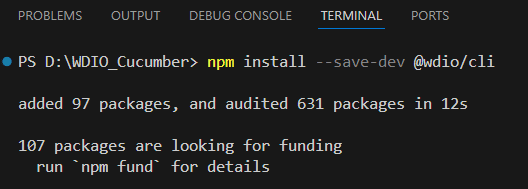
- Install the WebdriverIO CLI tool globally to facilitate project configuration. Run this cmd command “npm install –save-dev @wdio/cli”.
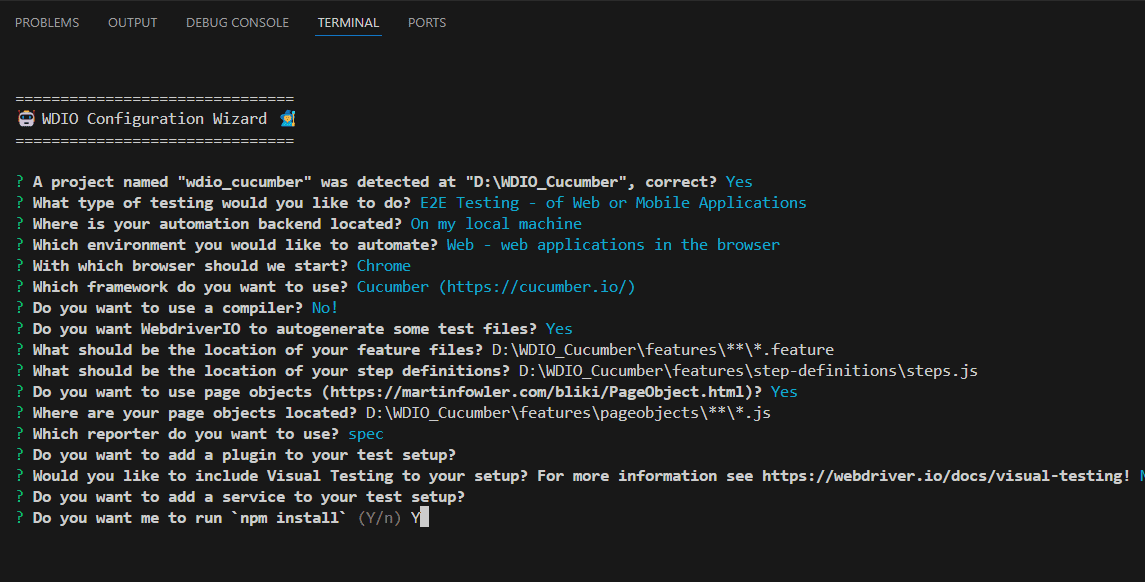
Run WebdriverIO Configuration Wizard
- Execute the WebdriverIO configuration wizard to set up your project. This interactive tool will guide you through selecting your preferred framework, reporter, and other configurations. Open your terminal and run “npx wdio config” with this given command.
Follow the on-screen instructions to complete the setup.
Directory Structure
Ensure your project structure looks like this:
wdio-cucumber-project/
├── features/
│   ├── step-definitions/
│   │   └── contact_us.steps.js
│   └── contact_us.feature
├── wdio.conf.js
└── package.json
Configure wdio.conf.js
[wdio.conf.js]
exports.config = {
    runner: 'local',

    specs: [
        './features/**/*.feature'
    ],
    exclude: [
    ],
       maxInstances: 10,

    capabilities: [{
        browserName: 'chrome'
    }],
    logLevel: 'info',

    bail: 0,

    waitforTimeout: 10000,

    connectionRetryTimeout: 120000,

    connectionRetryCount: 3,

    framework: 'cucumber',

    reporters: ['spec'],

    cucumberOpts: {
        require: ['./features/step-definitions/steps.js'],
        backtrace: false,
        requireModule: [],
        dryRun: false,
        failFast: false,
        name: [],
        snippets: true,
        source: true,
        strict: false,
        tagExpression: '',
        timeout: 60000,
        ignoreUndefinedDefinitions: false
    },
}
Writing Your First Test
[contact_us.feature]
Feature: Contact Us Functionality

  Scenario: Submit a message via Contact Us form
    Given I am on the contact us page
    When I fill in the contact us form with valid details
    And I submit the contact us form
    Then I should see a success message
Let’s deep dive into each line of the steps:
- Feature: A high-level description of a software feature.
- “Contact Us Functionality”: Describes the functionality related to the Contact Us page.
- Scenario: A specific behavior or use case of the feature.
- “Submit a message via Contact Us form”: Describes the scenario of submitting a message through the Contact Us form.
- Given: Precondition or initial context.
- “I am on the contact us page”: Indicates that the user should be on the contact us page.
- When: Action or event.
- “I fill in the contact us form with valid details”: Describes the action of filling out the contact form with valid information.
- “And I submit the contact us form”: Indicates the action of submitting the contact form.
- Then: Expected outcome.
- “I should see a success message”: Describes the expected result of seeing a success message after submitting the form.
[contact_us.steps.js]
const { Given, When, Then } = require('@cucumber/cucumber');
const { browser } = require('@wdio/globals');

let expect;

Given('I am on the contact us page', async () => {
    await browser.url('https://jignect.tech/contact-us/');
    const chai = await import('chai');
    expect = chai.expect;
});

When('I fill in the contact us form with valid details', async () => {
    await $("//span//textarea[contains(@name,'textarea')]").setValue('Software Testing');
    await $("//input[@placeholder='Full name']").setValue('Test User');
    await $("//input[@placeholder='Work email address']").setValue('Testuser01@yopmail.com');
    await $("//input[@placeholder='Company']").setValue('Testing Company');
    await $("//input[@placeholder='Phone number']").setValue('9568471235');
});

//When('I submit the contact us form', async () => {
   // await $("//p//span[contains(@class,'first last')]//input").click();
    //await $("//p//input[@type='submit']").click();
//});

Then('I should see a success message', async () => {
    const successMessageElement = await $("//div[contains(@class,'response-output')]");
    await successMessageElement.waitForDisplayed({ timeout: 5000 });
    const isThankYouMessageDisplayed = await successMessageElement.isDisplayed();
    expect(isThankYouMessageDisplayed).to.equal(true);
});
Let’s break down and explain each and every line of code:
- Imports Given, When, and Then from the @cucumber/cucumber package. These functions are used to define the steps of your test scenarios.
- Imports the browser object from WebdriverIO’s global namespace, which represents the browser instance you interact with during the tests.
- Declares a variable expect that will later hold the expect function from the Chai assertion library. This function is used to make assertions in the tests.
- Defines a step where the scenario’s context is set by navigating to the “Contact Us” page using the browser.url() method.
- Dynamically imports the Chai assertion library and assigns its expect function to the expect variable for use in assertions later.
- Defines a step where actions are performed to fill out the contact us form on the page. It uses selectors to find the form elements and set their values.
- Defines a step where the contact us form is submitted by clicking the submit button.
- Defines a step where it checks if the success message is displayed after form submission. It waits for the element to be displayed and then asserts that it is indeed shown.
- The code begins by importing necessary functions from @cucumber/cucumber and WebdriverIO, as well as preparing to use Chai for assertions.
- The Given step navigates to the “Contact Us” page.
- The When steps fill out and submit the contact us form with valid details.
- The Then step verifies that a success message is displayed after submitting the form.
Executing the Test Script
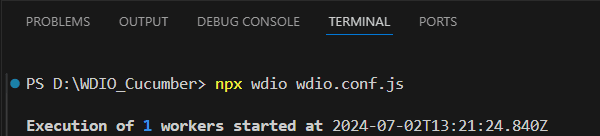
Once your test script is complete, you can launch it by running ‘npx wdio wdio.conf.js’ in the Command Prompt.
Conclusion
Combining WebdriverIO with Cucumber BDD offers a powerful approach to software testing that enhances clarity and efficiency. WebdriverIO provides a robust automation framework, while Cucumber’s Gherkin syntax enables writing test scenarios in a clear, business-readable format. This integration not only simplifies the testing process but also ensures that tests reflect real user behaviors and business requirements, leading to high-quality software outcomes.
However, this approach does come with some limitations. The initial setup and configuration can be complex, and maintaining Gherkin scenarios and step definitions requires ongoing effort. Additionally, there is a learning curve associated with both BDD principles and WebdriverIO’s features. Despite these challenges, the combination of WebdriverIO and Cucumber BDD remains a valuable tool for achieving comprehensive and effective software testing.
Keep practising and exploring to master these powerful tools further with Jignect.
Witness how our meticulous approach and cutting-edge solutions elevated quality and performance to new heights. Begin your journey into the world of software testing excellence. To know more refer to Tools & Technologies & QA Services.
If you would like to learn more about the awesome services we provide, be sure to reach out.
Happy Testing 🙂

")
