

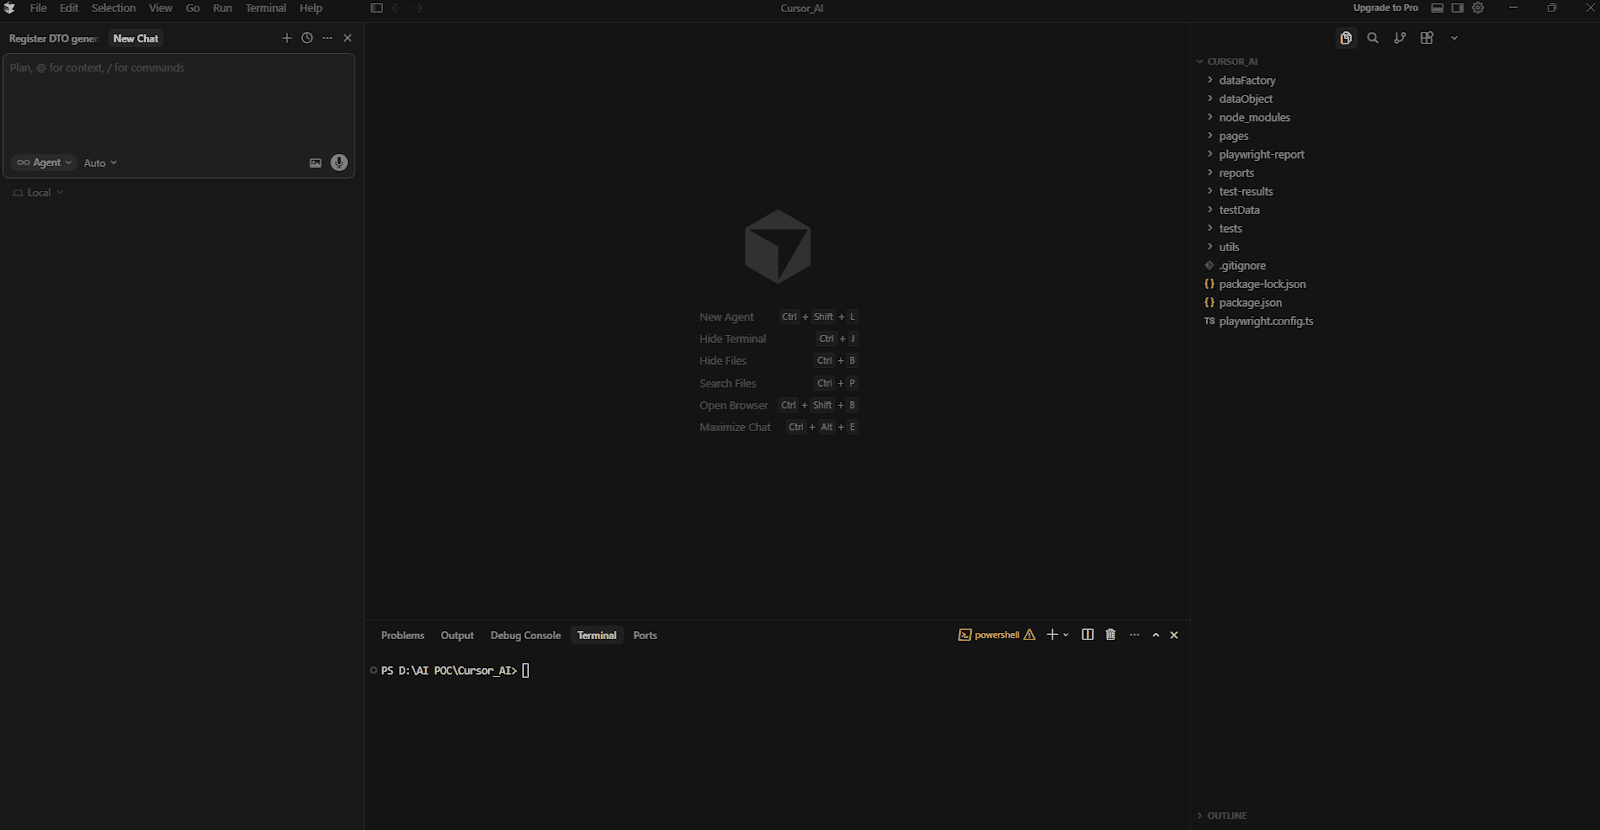
Cursor AI is basically a code editor with AI built right into it. Instead of using a separate chat tool and copying code back and forth, everything happens directly inside your project.
It’s built on top of Visual Studio Code, so if you’ve used VS Code before, nothing feels new or confusing. The layout, shortcuts, and overall experience stay the same – the difference is that now you have AI working alongside you while you code.
What makes Cursor interesting is that it doesn’t just look at a single file. It can understand your project as a whole. It looks at how files are connected, how functions are used, and how different parts of your code relate to each other.
Because of that, you can use it for things like:
- writing new code from a simple prompt
- updating or refactoring code across multiple files
- understanding parts of the codebase you didn’t write
- fixing issues or improving existing logic
For QA engineers, especially those working with TypeScript and Playwright, this becomes really useful. Most test frameworks aren’t just one file – they have page objects, test specs, data layers, and utilities all connected together.
Cursor is able to follow those connections. So if you’re working with something like the Page Object Model, it can still generate or update code without breaking the overall structure. That’s where it actually starts saving time.
- Cursor is a Standalone IDE – Not a Plugin
- Why Cursor for POM Test Generation
- What Makes Cursor Different for QA Engineers
- Installation and Setup
- Test Target (automationteststore.com – Registration Flow)
- Cursor Generates the Data Layer (Data Object + Data Factory)
- Cursor Generates the Page Object
- Pre-Test Refinement: Preparing the Flow for Execution
- Cursor Generates the Test Spec
- Executing the Test and Observing Results
- AI-Assisted Execution and Stabilisation
- Advanced Cursor Workflows for Scalable Test Automation
- Limitations
- Best Practices for Using Cursor in Test Automation
- Key Takeaways
- Conclusion: What We Built and What It Means
Cursor is a Standalone IDE – Not a Plugin
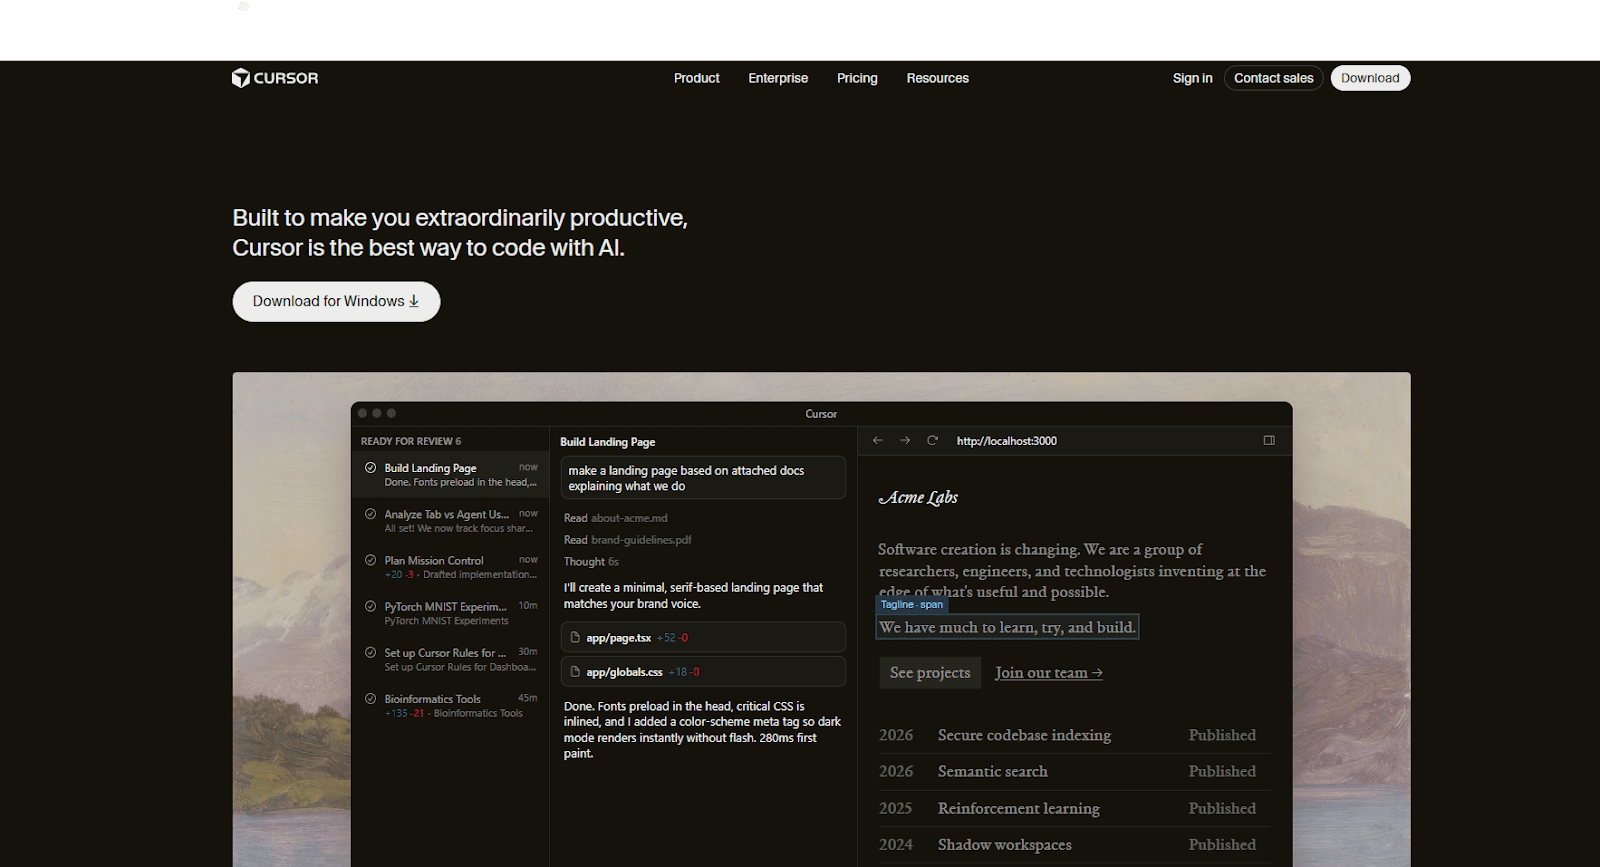
Cursor is not a Visual Studio Code extension. It is a standalone code editor that you install as a separate application.
You download Cursor AI from cursor.com and install it on your system just like any other development environment. Once installed, Cursor becomes your primary editor for writing and managing code.
Although Cursor is a standalone IDE, it is built on the same underlying editor foundation used by VS Code. Because of this, it supports many VS Code extensions and allows you to import your existing settings in a single step.
This means developers can transition to Cursor without changing their familiar development workflow. However, VS Code itself is not required for Cursor to run.
All AI capabilities discussed in this guide – including Composer, Agent Mode, codebase indexing, and multi-file editing – are built directly into Cursor. They are native features of the editor rather than external plugins.
Why Cursor for POM Test Generation
This guide has one clear focus: showing you step by step how Cursor can generate a complete, production-ready Page Object Model (POM) test suite for a user registration flow on automationteststore.com. Because Cursor understands the relationships between files in a codebase, it can generate and refine automation code while respecting the structure of a testing framework.
Every prompt used in this process is documented, every output is shown, and every place where Cursor’s first result required refinement is explained.
The architecture demonstrated in this guide follows the structure DO → DF → POM → Test, implemented in TypeScript using Playwright Test. The test itself is intentionally kept simple: the “RegisterPage” object is instantiated directly inside the test with a single line of code, without using fixture wrappers. For a single-page object scenario, this direct instantiation keeps the test lean while maintaining a clear separation between test logic and page behaviour.
What Makes Cursor Different for QA Engineers
Cursor vs. Copilot vs. ChatGPT – The QA Lens
There are several AI coding tools available today. The comparison below highlights how Cursor differs from two common alternatives when used for test automation and framework development.
| Capability | Cursor A | GitHub Copilot | ChatGPT |
| Reads your full codebase | Full codebase indexing with semantic awareness | Full repo indexing (Enterprise); file-level on lower plans | Context provided manually or via tools |
| Generates multiple files at once | Yes – Composer handles coordinated multi-file diffs natively | Yes via Copilot Edits & agent – less refined than Cursor | Can generate multi-file code; manual integration required |
| Understands your TypeScript interfaces | Deep understanding with full project context (DO/DF/POM aware) | Good understanding within local/editor context | Good understanding within chat context |
| Autonomous task execution | Parallel agents locally, in cloud VMs, and via remote SSH | Cloud agent works beyond PR workflows – branches, research, planning, and PR creation | Limited – depends on tools/agent capabilities |
| Inline fix for terminal errors | Native inline fix directly in the IDE | Agent mode can self-heal runtime errors in VS Code | No direct integration with IDE |
| Multi-file refactor in one diff | Yes – Composer generates visual diffs across many files at once | Yes via Copilot Edits – less capable for large-scale refactors | Yes via agents/PRs – least integrated experience |
| @Codebase / @Docs / @Web context | Built-in @Codebase, @Docs, @Web context tools | Repo context + Bing search on GitHub.com; limited @Docs | Available via tools, plugins, or manual input |
Features That Matter: Composer, Agent Mode, @Codebase
Cursor AI provides several built-in capabilities that make it particularly effective for QA engineers building automation frameworks using tools such as Playwright and TypeScript.
Note: In recent versions of Cursor, the Composer workflow is accessed through the AI chat panel.
Composer (AI Code Generation)
Composer is the primary way to generate and modify code in Cursor. In the current interface, this functionality is accessed through the AI chat panel.
You describe what you want in natural language, and Cursor analyses your existing project files for context. It then proposes the required changes as reviewable diffs. You can accept the change, reject it, or modify the prompt and iterate.
This workflow allows developers and QA engineers to safely generate or refactor code across multiple files while reviewing each change before it is applied.
Agent Mode
Agent Mode extends Composer by allowing Cursor to execute multi-step development tasks autonomously.
Instead of generating one file and waiting for further instructions, Agent Mode can:
- Create directories
- Generate multiple files
- Run terminal commands
- Read command output
- Adjust the implementation based on results
This allows Cursor to complete larger tasks, such as scaffolding a test automation structure or implementing a new feature across several files.
@Codebase
The @Codebase feature allows you to ask questions about your project using natural language.
Examples include:
- “Which file defines the ‘RegistrationData’ interface?”
- “What locator does ‘RegisterPage’ use for the email field?”
- “If I add a telephone field, which files will need to change?”
Cursor searches the indexed repository and returns answers with file names and line references from your actual codebase, making it easier to understand and modify large automation projects.
Why TypeScript Amplifies Cursor’s Output Quality
Cursor AI generates better results when your project provides strong structural information. TypeScript provides exactly that through interfaces, typed method signatures, and generics.
These type definitions describe the shape of your data and the contracts between different parts of your codebase. When Cursor analyses a TypeScript project, it can use this structure to generate more accurate and consistent code.
For example, if Cursor sees a method signature like fillForm(data: RegistrationData), it immediately understands which fields exist in RegistrationData, which fields are required, and which fields are optional. Because of this, Cursor does not need to guess which values should be passed to the method.
This means Cursor does not need to guess which values to pass to the method.
Similarly, if Cursor encounters something like UserDataFactory.create(): RegistrationData, it knows exactly what object shape the factory returns and can generate test code that correctly matches the interface.
Because of this, TypeScript effectively acts as built-in documentation that Cursor can read and follow. This makes TypeScript particularly powerful when building structured automation architectures such as DO → DF → POM → Test.
Pro Tip: After accepting a Cursor-generated change, run npx tsc –noEmit. This command runs the TypeScript compiler without generating output files and immediately detects type mismatches, missing fields, or incorrect method usage before you run your tests.
Installation and Setup
Installing Cursor
To install Cursor, just head over to cursor.com and download it. The site usually figures out your OS on its own, so you don’t really have to think about which version to pick.
The installation itself is nothing special – just run the installer and follow the usual steps like you would for any other app.
When you open Cursor for the first time, it’ll ask you to sign in. This part happens in your browser. You can log in using Google, GitHub, Apple, or just your email – whatever you prefer. Once you’re done, it brings you back into the editor.
After that, you’ll land on a welcome screen. It gives you a few options like opening a project, cloning a repo, or connecting over SSH. For this guide, just pick “Open project” and select your local automation project.
You might also see a prompt asking if you want to import your VS Code setup – things like extensions, themes, and shortcuts. Totally optional, but if you’ve been using VS Code already, it saves you some setup time.
And that’s pretty much it. At this point, you’re inside Cursor and ready to start using it.
First Launch and Model Selection
Once Cursor is open, you can choose which AI model powers code generation.
Cursor includes an Auto mode, which automatically selects the best model depending on the task. For most users, leaving this option enabled works well and requires no additional configuration.
If you prefer to select a model manually, open the AI panel and disable Auto. Cursor will then display the available models.
The exact list of models may vary depending on your plan and connected providers, but Cursor typically includes several options optimized for code generation and reasoning.

For this guide, the default Auto mode works well and requires no additional configuration.
Playwright + TypeScript Project Setup Using Cursor AI
Instead of manually installing Playwright, configuring TypeScript, and creating the automation framework structure, we can ask Cursor to generate the entire setup using a single prompt. This approach removes the need for manual configuration and ensures that the project follows a consistent structure from the beginning.
The following prompt instructs Cursor to initialize a Node.js project, install Playwright and TypeScript dependencies, configure the Playwright test runner, and generate the base folder structure required for the automation framework.
Cursor Prompt:
👤 Role
- You are a Playwright automation framework generator.
- Set up a ready-to-use Playwright UI automation framework using TypeScript.
- This prompt is ONLY for framework setup (no feature files).


📦 Project Setup Requirements
- Create a Node.js project
- Initialize npm
- Install Playwright and required TypeScript dependencies automatically
- Ensure the project runs successfully after setup


📁 Folder Structure to Create
- dataObject/
- dataFactory/
- pages/
- tests/
- testData/
- utils/
- reports/


📌 Folder Rules
- All folders must be created empty
- Do NOT add any feature-related files
- HTML reports must be generated only inside the reports/ folder


📄 Necessary Framework Files Only
- package.json with proper Playwright scripts
- playwright.config.ts with TypeScript config, chromium browser, baseURL, HTML report
- .gitignore ignoring node_modules, playwright-report, test-results
- README.md with setup instructions and folder structure explanation


🏗️ Framework Rules
- Framework must be ready for Playwright + TypeScript UI automation
- Use clean, readable, standard Playwright configuration
- No feature logic, no test specs, no page objects
- Framework must be reusable and scalable


✅ Final Output
- Folder structure created
- Dependencies installed successfully
- Necessary configuration files created
- Framework ready for writing UI automation tests

📤 Return the response by creating actual folders and files.
Input:
📌 Project Details
Automation Tool: Playwright
Language: TypeScript
Test Framework: @playwright/test
Browser: Chromium
Reporting: Playwright built-in HTML report
What Cursor Does:
After running the prompt, Cursor automatically performs the complete framework setup. This includes initialising the Node.js project, installing Playwright and TypeScript dependencies, and downloading the Chromium browser required for Playwright tests.
The Cursor also generates the necessary framework configuration files and prepares the project so it can run Playwright tests immediately.
The setup process includes the following steps:
• Initialises the Node.js project using npm
• Installs required dependencies such as @playwright/test, typescript, ts-node, and @types/node
• Installs the Chromium browser using Playwright
• Generates the Playwright configuration file
• Creates the base folder structure for the automation framework
• Adds supporting files such as .gitignore and README.
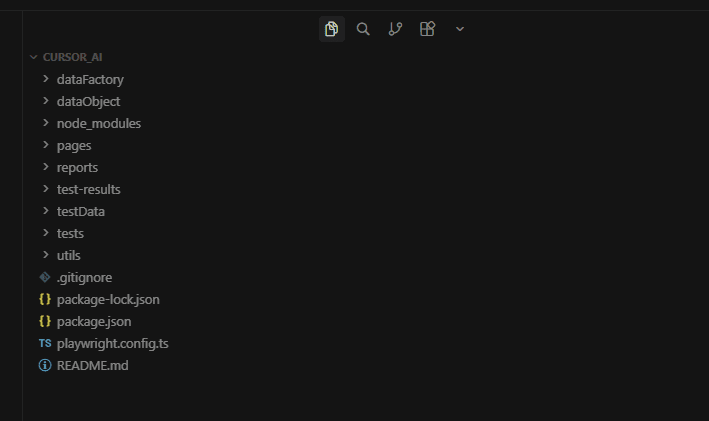
Generated Folder Structure:
The prompt creates the following folders in the project root:
| – dataObject/ – dataFactory/ – pages/ – tests/ – testData/ – utils/ – reports/ |
All folders are intentionally created empty so that the automation components can be generated step by step in the next sections of this guide.
Framework Configuration Files:
Cursor also generates the essential framework files required to run Playwright tests:
- package.json – Contains Playwright scripts used to execute tests in different modes such as headless, headed, debug, and Playwright UI mode.
- playwright.config.ts – Defines the Playwright test configuration, including the browser, reporter, screenshot behaviour, video recording, and tracing settings.
- .gitignore – Prevents unnecessary files such as node_modules, test-results, and reports from being committed to version control.
- README.md – Provides setup instructions and a brief explanation of the folder structure.
At this stage, the Playwright + TypeScript automation framework is fully configured and ready to run tests. The folders created in this step will be populated in the following sections as we generate the Data Object, Data Factory, Page Object, and test specifications using Cursor AI.
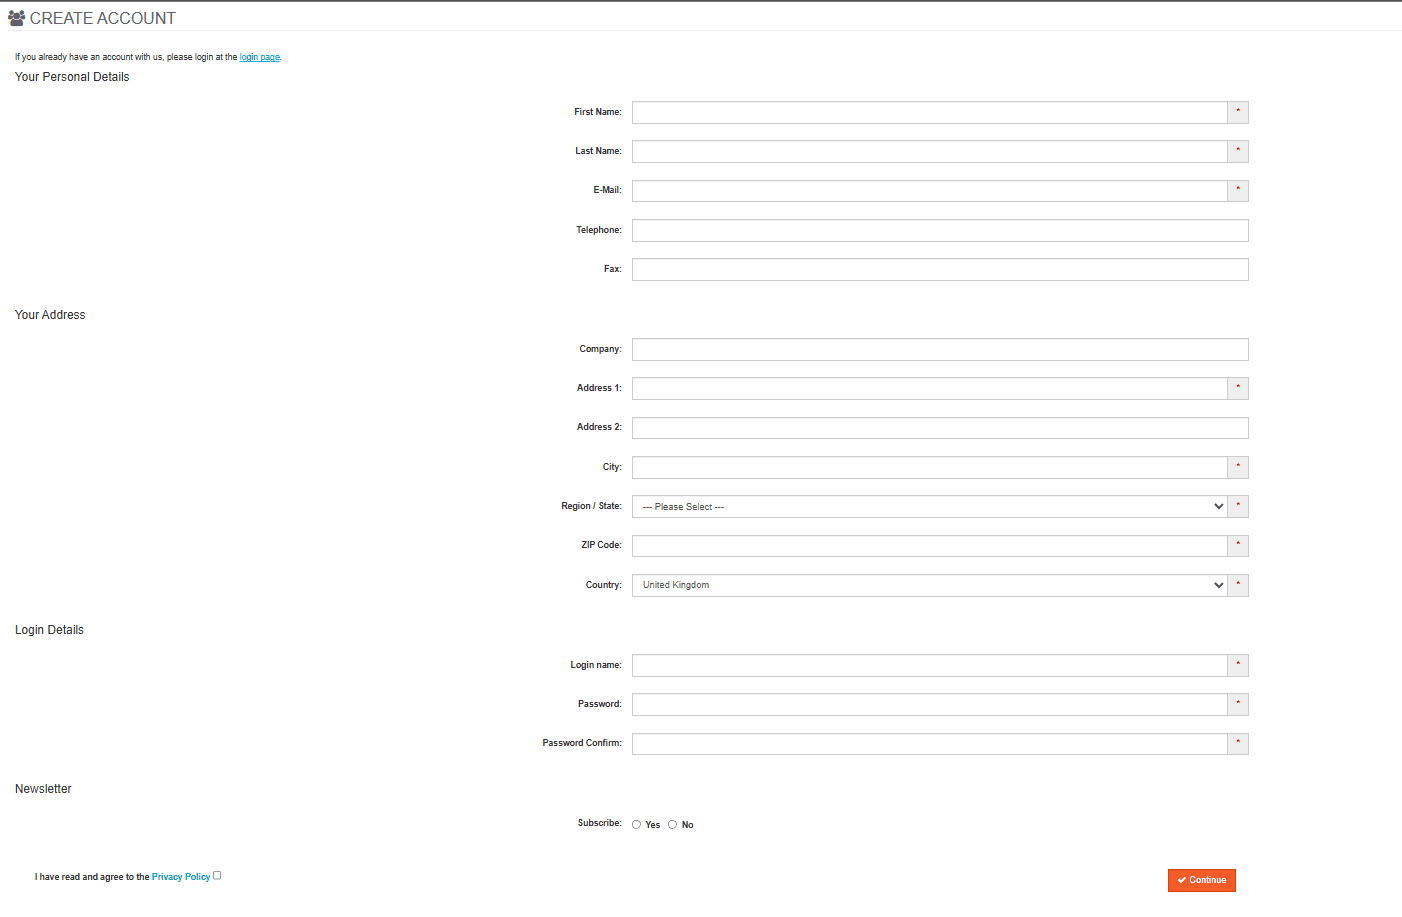
Test Target (automationteststore.com – Registration Flow)
automationteststore.com is a publicly available e-commerce demo site commonly used for automation practice. In this guide, we automate the user registration flow.
The application requires unique account credentials. Submitting the same data twice will cause the registration to fail, which means the automation must generate fresh data for each test run.
After a successful registration, the site redirects the user to the account page and displays a confirmation message. Our test focuses on generating valid data and completing the registration flow successfully.
With the target application defined, we can now ask Cursor to scaffold the project structure that will support the automation layers used in this guide.
Cursor Generates the Data Layer (Data Object + Data Factory)
The Single Prompt
Cursor Prompt with Input:
👤 Role
- You are a Senior QA Automation Architect specialising in Playwright + TypeScript automation frameworks.
- This prompt generates TWO files in sequence: first the Data Object (DTO), then the Data Factory.
- Generate the DTO file first, then use it to generate the DataFactory file.

━━━━━━━━━━━━━━━━━━━━━━━━━━━━━━━━
STEP 1 - Generate the Data Object
━━━━━━━━━━━━━━━━━━━━━━━━━━━━━━━━

🎯 Objective
- Generate a DTO file based on the provided entity name and screenshot.
- This DTO represents ONLY the structure of test data (model only).

🏗️ Architecture Rules
- No business logic.
- No test logic.
- No Playwright dependency.
- No imports unless absolutely necessary.

🚫 Field Rules
- Include all text input fields.
- Include dropdown / select fields as string type.
- Include checkbox fields that are functionally required for form submission (e.g. privacyPolicy) as boolean type.
- Exclude checkbox fields that are optional and not required for the core flow (e.g. subscribe, newsletter).
- Exclude radio buttons - handle them directly in Page Objects.

💻 Coding Standards
- Use TypeScript strict typing.
- Use export interface (not class).
- Keep it minimal and clean.
- No constructor.
- No default values.
- No validation logic unless explicitly requested.
- No methods.
- No comments inside fields.
- Keep formatting professional and readable.
- Field names must be short camelCase - do NOT expand or rephrase (e.g., use privacyPolicy not privacyPolicyAccepted)
- Do NOT use semicolons

📤 Output Rules
- Output only the TypeScript code
- Do not add explanations
- Do not wrap inside markdown
- Do not add extra text before or after
- Provide clean export-ready code
- File must be named exactly as EntityName.ts (e.g., Register.ts) - no suffixes like .dto, .model, .type
- File must be created inside the dataObject/ folder
- Resolve the correct file path by reading the actual project folder structure - place the file where it fits best based on existing folder organisation
- Use the editor to physically create and save the file - do NOT just show the code

━━━━━━━━━━━━━━━━━━━━━━━━━━━━━━━━
STEP 2 - Generate the Data Factory
━━━━━━━━━━━━━━━━━━━━━━━━━━━━━━━━

🎯 Objective
- Generate the DataFactory class using the DTO file created in Step 1.

Rules:
- One factory class per feature
- Class name must be: [FeatureName]DataFactory
- Use: export default class
- Main method name must be: getData()
- getData() must be a public instance method - do NOT make it static
- Return type must be the DTO class generated in Step 1
- Initialise the DTO object as: const [entityName]Data = {} as [DTOName]
- Do NOT pre-populate fields with empty strings or false values
- Do NOT use an inline object literal with default value
- Create a separate DTO object inside getData(), assign each field individually using dot notation, then return it
- Import faker from '@faker-js/faker' - use Faker for all field values
- Import the DTO as a named import - do NOT use import type
- Resolve all import paths by reading the actual project folder structure - do NOT hardcode ../ or ../../
- Use semantically appropriate Faker methods for each field based on the field name and its purpose (e.g. faker.person.firstName() for firstName,
       faker.internet.email() for email,
       faker.location.zipCode() for zipCode,
       faker.location.streetAddress() for address fields,
       faker.company.name() for company,
       faker.phone.number() for phone and fax fields)
- For login and username fields, use faker.internet.username() - do NOT use the deprecated faker.internet.userName()
- For boolean fields, use faker.datatype.boolean()
- For password and password confirmation fields, store the generated value in a const and assign to both fields - do not call faker twice

Dropdown Handling Rules:
- Check the DF Input section for each dropdown field
- There are two types of dropdown input:

  TYPE 1 - Independent dropdown (simple array):
  Provided as: fieldName: ['option1', 'option2', 'option3']
  Define as a private static readonly constant at the top of the class body - not inside the method
  Use faker.helpers.arrayElement(CONSTANT_NAME) to assign the value
  Example:
    private static readonly TITLE_OPTIONS = ['Mr', 'Mrs', 'Ms', 'Dr']
    titleData.title = faker.helpers.arrayElement(RegisterDataFactory.TITLE_OPTIONS)

  TYPE 2 - Dependent dropdown (record map where child options depend on parent selection):
  Provided as: parentField > childField: { 'parent1': ['child1', 'child2'] }
  Define as a private static readonly Record constant at the top of the class body - not inside the method
  Use faker.helpers.objectKey() to select the parent value - do NOT use Object.keys() with type casting
  Use faker.helpers.arrayElement() to select the child value from the array mapped to the selected parent
  Example:
    private static readonly COUNTRY_REGIONS: Record<string, string[]> = {
      'United Kingdom': ['London', 'Manchester'],
      'United States': ['New York', 'California'],
    }
    const country = faker.helpers.objectKey(RegisterDataFactory.COUNTRY_REGIONS)
    registerData.country = country
    registerData.regionOrState = faker.helpers.arrayElement(
      RegisterDataFactory.COUNTRY_REGIONS[country]
    )


- For dependent dropdowns, always assign the parent field first, then use its value to assign the child field - never assign child before parent
- Define all constants at the top of the class body before getData()
- If no array is provided for a dropdown field in DF Input, leave
  a TODO comment in this exact format:
  // TODO: [entityName]Data.[fieldName] = <add predefined options array>

- Do NOT assign undefined to any field
- Do NOT add @ts-expect-error, @ts-ignore, or eslint-disable comments
- No test logic inside the factory
- No business logic inside the factory
- Follow strict TypeScript typing - do not use type any
- Do not add a constructor
- Do NOT use semicolons
- Follow clean and simple structure like a standard Playwright framework
- Apply every rule listed here - do not skip or simplify any of them


File Location Rules:
- File must be named exactly as [FeatureName]DataFactory.ts (e.g., RegisterDataFactory.ts) - no suffixes like .factory, .data, .helper
- File must be created inside the dataFactory/ folder
- Resolve the correct file path by reading the actual project folder structure - place the file where it fits best based on existing folder organisation
- Use the editor to physically create and save the file - do NOT just show the code

📤 Output Rules (VERY IMPORTANT)
- Output TypeScript code only
- No explanations
- No extra text before or after the code
- Clean, export-ready code
- Do NOT use semicolons
- Follow formatting of a professional enterprise Playwright project

━━━━━━━━━━━━━━━━━━━━━━━━━━━━━━━━
DO Input
━━━━━━━━━━━━━━━━━━━━━━━━━━━━━━━━
Entity Name: Register
Screenshot: Attached

━━━━━━━━━━━━━━━━━━━━━━━━━━━━━━━━
DF Input (optional - provide only what is needed)
━━━━━━━━━━━━━━━━━━━━━━━━━━━━━━━━
country > regionOrState: {
  'United Kingdom': ['Aberdeen', 'Edinburgh', 'Greater London'],
  'United States': ['New York', 'California', 'Texas', 'Florida'],
  'India': ['Maharashtra', 'Karnataka', 'Delhi', 'Gujarat']
}
Cursor’s Output – Register.ts
Cursor Output:
export interface Register {
  firstName: string
  lastName: string
  email: string
  telephone: string
  fax: string
  company: string
  address1: string
  address2: string
  city: string
  regionOrState: string
  zipCode: string
  country: string
  loginName: string
  password: string
  passwordConfirm: string
  privacyPolicy: boolean
}
Cursor’s Output – RegisterDataFactory.ts
Cursor Output:
import { faker } from '@faker-js/faker'
import { Register } from 'dataObject/Register'

export default class RegisterDataFactory {
  private static readonly COUNTRY_REGIONS: Record<string, string[]> = {
    'United Kingdom': ['Aberdeen', 'Edinburgh', 'Greater London'],
    'United States': ['New York', 'California', 'Texas', 'Florida'],
    'India': ['Maharashtra', 'Karnataka', 'Delhi', 'Gujarat'],
  }

  public getData(): Register {
    const registerData = {} as Register

    registerData.firstName = faker.person.firstName()
    registerData.lastName = faker.person.lastName()
    registerData.email = faker.internet.email()
    registerData.telephone = faker.phone.number()
    registerData.fax = faker.phone.number()

    registerData.company = faker.company.name()
    registerData.address1 = faker.location.streetAddress()
    registerData.address2 = faker.location.secondaryAddress()
    registerData.city = faker.location.city()
    registerData.zipCode = faker.location.zipCode()

    const country =
    faker.helpers.objectKey(RegisterDataFactory.COUNTRY_REGIONS)
    registerData.country = country
    registerData.regionOrState = faker.helpers.arrayElement(
      RegisterDataFactory.COUNTRY_REGIONS[country]
    )

    registerData.loginName = faker.internet.username()
    const password = faker.internet.password()
    registerData.password = password
    registerData.passwordConfirm = password
    registerData.privacyPolicy = true
    return registerData
  }
}
What Cursor Got Right
Cursor generated both the Data Object and Data Factory correctly in a single pass while following the architectural and coding rules defined in the prompt.
For the Data Object, Cursor correctly identified all relevant input fields from the screenshot and mapped them to a clean TypeScript interface using strict typing. Text fields, dropdown fields such as country and regionOrState, and required checkbox fields like privacyPolicy were all included with appropriate types. At the same time, optional fields such as newsletter or subscription radio buttons were correctly excluded based on the rules. All field names follow clean camelCase naming and align directly with the form labels without unnecessary expansion.
For the Data Factory, the cursor correctly used the prompt and the provided rules to generate realistic and semantically accurate test data using the faker library. Each field uses an appropriate Faker method based on its purpose – for example, faker.person.firstName() for names, faker.internet.email() for email, and faker.location.zipCode() for postal codes. This demonstrates that Cursor understands not just types, but also the intent behind each field.
A key strength in this output is the handling of dependent dropdowns. Cursor correctly defined a COUNTRY_REGIONS mapping as a static constant and used faker.helpers.objectKey() to select a country, followed by faker.helpers.arrayElement() to select a corresponding region/state. It also respected the correct assignment order by setting the parent field (country) before the dependent field (regionOrState).
Another important detail is how the password field was handled. Instead of generating two separate values, Cursor stored the generated password in a constant and reused it for passwordConfirm, ensuring consistency and preventing test failures.
Another important detail is how boolean fields are handled. Instead of assigning random values to fields that are required for successful form submission, such as privacyPolicy, the Data Factory assigns a valid constant value (true). This ensures that the generated test data always satisfies mandatory conditions and prevents unnecessary test instability.
Optional boolean fields, if present, can still use faker.datatype.boolean(), but required fields are kept deterministic. This distinction helps maintain clean test logic and avoids introducing defensive or corrective logic inside the test layer.
Cursor Generates the Page Object
The Prompt
Cursor Prompt:
👤 Role
- You are a Senior QA Automation Architect specialising in Playwright + TypeScript automation frameworks.

🎯 Objective
- Generate a TypeScript Page Object class for a Playwright framework following strict layered architecture.

📥 Input
- Feature / Entity Name: <FeatureName>
- Page File Name: <FeatureName>Page.ts
- Data Object: @file:dataObject/<FeatureName>.ts
- Data Factory (reference only): @file:dataFactory/<FeatureName>DataFactory.ts
- Screenshot: <Attach Screenshot>

🏗️ Architectural Rules
- Follow clean layering: Tests → Pages → DataFactory → DataObject → Utils
- Page must contain only UI interaction logic
- No assertions
- No test logic
- No business logic
- No hardcoded test data
- Must NOT use DataFactory
- Must import and use Data Object
- Generate locators and methods ONLY for fields that exist in the provided Data Object - do NOT add anything from the screenshot that is not in the DO
- If a field is visible in the screenshot but not in the DO, ignore it completely
- Data Factory is provided for reference only - use it to understand the data structure and dropdown option values
- Do NOT import or use the Data Factory inside the Page Object

💻 Coding Rules
- Use export default class
- One class per file
- No any type - use strict TypeScript typing
- Clean, readable, enterprise-level structure
- Do NOT use semicolons
- Import the Data Object as a named import - do NOT use import type
- Do NOT add any inline comments, block comments, or explanatory comments anywhere inside the class body

📌 Locator Rules
- Derive ALL locators strictly from the screenshot
- Every label, placeholder, button text, field name, and role must be read directly from the screenshot - do NOT assume, guess, paraphrase, or substitute any text with a synonym
- If any text is not clearly visible in the screenshot, leave a TODO comment on that locator line instead of guessing
- Prefer: getByRole, getByLabel, getByPlaceholder, data-testid
- Avoid brittle selectors (nth-child, dynamic ids, weak CSS)
- Avoid regex unless necessary - prefer exact, stable locators
- Declare all locators at the top of the class
- Always declare a pageHeading locator as the first locator using a structural locator - do NOT use text in the locator: page.locator('h1').first() or page.locator('#content h1')
- Locator naming convention must be: [fieldName][ElementType] (e.g., firstNameInput, countrySelect, continueButton) Do NOT use Hungarian notation like inputFirstName or btnContinue
- For checkbox fields whose label contains mixed content such as normal text combined with a hyperlink, ALWAYS use an attribute-based locator (e.g., page.locator('input[name="agree"]') or   page.locator('input[type="checkbox"]').last()) NEVER use getByRole or getByLabel for mixed-content labels

📌 Method Rules
- Derive methods based on the form structure visible in the screenshot
- A single-page form must use ONE method regardless of how many visual sections or section headings are present on the page
- Only split into multiple methods if the form has multiple pages, tabs, or wizard steps
- Always generate a dedicated getter method for the page heading that returns the heading text as a string
- Method names must be semantic and reflect user intent
- Form methods must:
  - accept the Data Object as the first parameter
  - return Promise<void> unless explicitly required otherwise
- Dropdown / select fields:
  - If included in the Data Object as string type, read the value directly from the Data Object - do NOT add extra parameters
  - If excluded from the Data Object, accept their values as separate method parameters named after the field label
  - Maintain dependency order between related fields (e.g., select parent dropdown before child dropdown)
- Do NOT include:
  - validation logic
  - conditional field existence checks
  - data transformation logic
  - unnecessary branching or over-engineering

📌 Boolean Handling Rules
- For checkbox fields included in the Data Object as boolean: use setChecked(data.fieldName)
- Do NOT add conditional if/else logic for boolean fields
- Do NOT add interactions for any boolean field not present in the DO

📌 Interaction Rules
- Button actions must return Promise<void>
- Table interactions (if present) must follow reusable row locator patterns
- Use utility classes for complex components if required

📤 Output Rules (VERY IMPORTANT)
- Output only TypeScript code
- Do not add explanations
- Do not wrap inside markdown
- Do not add extra text before or after
- Provide clean export-ready code
- File must be named exactly as <FeatureName>Page.ts (e.g., RegisterPage.ts) - no suffixes like .page, .po, .object
- File must be created inside the pages/ folder
- Resolve the correct file path by reading the actual project folder structure - place the file where it fits best based on existing folder organisation
- Use the editor to physically create and save the file - do NOT just show the code
Cursor’s Output – RegisterPage.ts
Cursor Output:
import { Page, Locator } from '@playwright/test'
import { Register } from 'dataObject/Register'

export default class RegisterPage {
  private pageHeading: Locator
  private firstNameInput: Locator
  private lastNameInput: Locator
  private emailInput: Locator
  private telephoneInput: Locator
  private faxInput: Locator
  private companyInput: Locator
  private address1Input: Locator
  private address2Input: Locator
  private cityInput: Locator
  private regionOrStateSelect: Locator
  private zipCodeInput: Locator
  private countrySelect: Locator
  private loginNameInput: Locator
  private passwordInput: Locator
  private passwordConfirmInput: Locator
  private privacyPolicyCheckbox: Locator
  private continueButton: Locator


  constructor(private readonly page: Page) {
    this.pageHeading = this.page.locator('h1').first()

    this.firstNameInput = this.page.getByLabel('First Name:')
    this.lastNameInput = this.page.getByLabel('Last Name:')
    this.emailInput = this.page.getByLabel('E-Mail:')
    this.telephoneInput = this.page.getByLabel('Telephone:')
    this.faxInput = this.page.getByLabel('Fax:')

    this.companyInput = this.page.getByLabel('Company:')
    this.address1Input = this.page.getByLabel('Address 1:')
    this.address2Input = this.page.getByLabel('Address 2:')
    this.cityInput = this.page.getByLabel('City:')
    this.regionOrStateSelect = this.page.getByLabel('Region / State:')
    this.zipCodeInput = this.page.getByLabel('ZIP Code:')
    this.countrySelect = this.page.getByLabel('Country:')


    this.loginNameInput = this.page.getByLabel('Login name:')
    this.passwordInput = this.page.getByLabel('Password:')
    this.passwordConfirmInput = this.page.getByLabel('Password Confirm:')

    this.privacyPolicyCheckbox = this.page.locator('input[type="checkbox"]').last(
    this.continueButton = this.page.getByRole('button', { name: 'Continue' })
  }

  public async getPageHeadingText(): Promise<string> {
    return await this.pageHeading.innerText()
  }

  public async createAccount(data: Register): Promise<void> {
    await this.firstNameInput.fill(data.firstName)
    await this.lastNameInput.fill(data.lastName)
    await this.emailInput.fill(data.email)
    await this.telephoneInput.fill(data.telephone)
    await this.faxInput.fill(data.fax)

    await this.companyInput.fill(data.company)
    await this.address1Input.fill(data.address1)
    await this.address2Input.fill(data.address2)
    await this.cityInput.fill(data.city)

    await this.countrySelect.selectOption(data.country)
    await this.regionOrStateSelect.selectOption(data.regionOrState)
    await this.zipCodeInput.fill(data.zipCode)

    await this.loginNameInput.fill(data.loginName)
    await this.passwordInput.fill(data.password)
    await this.passwordConfirmInput.fill(data.passwordConfirm)

    await this.privacyPolicyCheckbox.setChecked(data.privacyPolicy)
    await this.continueButton.click()
  }
}
Locator Generation
Cursor generated all locators at the top of the class, following a clean and consistent structure. It used Playwright’s recommended locator strategies, such as getByLabel and getByRole, which are more stable than CSS-based selectors.
Each locator is derived directly from the screenshot without guessing or modifying label text. The naming convention is also consistent and readable, using patterns like firstNameInput, countrySelect, and continueButton.
For the privacy policy checkbox, Cursor used an attribute-based locator instead of relying on label text. This aligns with the rule for handling mixed-content labels and avoids brittle selectors.
createAccount(data: Register) – The Key Method
Cursor generated a single method that represents the full user interaction flow for the registration form.
The method:
- Accepts the Register Data Object
- Uses dot notation to access all field values
- Fills all fields sequentially in a clear and readable order
- Handles dropdowns using values directly from the Data Object
- Performs the final submit action
Dropdown handling is implemented correctly, with the parent field (country) selected before the dependent field (regionOrState).
Boolean handling is also clean – the checkbox value is directly passed using setChecked, without introducing unnecessary conditional logic.
What Cursor Got Right
Cursor generated a clean and well-structured Page Object in a single pass while adhering closely to the rules defined in the prompt.
The most important aspect is the strict alignment between the Page Object and the Data Object. Cursor correctly generated locators and interactions only for the fields present in the Register interface, ignoring any additional elements from the screenshot. This keeps the Page Object tightly coupled with the data layer and avoids unnecessary complexity.
Locator generation is handled well. Cursor used stable Playwright locator strategies such as getByLabel and getByRole, avoiding brittle selectors. It also followed a consistent naming convention, making the locators easy to understand and maintain.
Method design is another strong area. Cursor correctly generated a single method for the form instead of splitting it into multiple smaller methods. The method is clean, sequential, and directly maps to real user actions.
Dropdown handling demonstrates good contextual understanding. Cursor used values directly from the Data Object and maintained the correct dependency order between country and region/state selection.
Boolean handling is also implemented correctly. The checkbox interaction uses setChecked with a value from the Data Object, avoiding conditional branching and keeping the logic simple.
Finally, the Page Object maintains proper separation of concerns. It contains only UI interaction logic, with no assertions, no test logic, and no business rules, which aligns with a clean automation architecture.
Pre-Test Refinement: Preparing the Flow for Execution
At this stage, we have a fully functional Page Object for the registration form. However, there is a practical limitation: the registration page is not directly accessible.
To reach the registration form on automationteststore.com, a user must first navigate through multiple steps:
- Click the “Login or register” link from the homepage
- Click the “Continue” button under the New Customer section on the login page
Additionally, after successful registration, the application redirects the user to a confirmation page where the success message is displayed.
This introduces a gap between what Cursor generated and what is required to execute a real end-to-end test.
Why This Matters:
Cursor generates code based on the context provided in the prompt. In our case, the prompt included only the registration page screenshot and Data Object, so Cursor correctly generated the RegisterPage.
However, Cursor does not infer multi-step navigation or full application flow unless those steps are explicitly included. This means both pre-navigation steps and post-action validation pages must be handled explicitly before test generation.
Adding Navigation Page Objects:
To bridge this gap, we introduce three lightweight Page Objects:
- HomePage.ts – handles navigation from the homepage to the login page
- LoginPage.ts – handles navigation from the login page to the registration page
- AccountCreatedPage.ts – represents the success page displayed after successful registration
These Page Objects are intentionally minimal and focused only on their specific responsibilities.
In addition to navigation actions, each Page Object includes a method to retrieve the page heading. This allows us to assert that navigation or actions have completed successfully before proceeding to the next step. Validating the page heading ensures that the test is interacting with the correct page and adds stability to the overall flow.
Instead of overloading the Cursor prompt with multiple screens and flows, these supporting Page Objects are added manually. This keeps the guide focused on the registration flow while still reflecting a real-world automation scenario.
Base URL Configuration:
In addition to handling navigation, we configure the application’s base URL inside the Playwright configuration:
use: {
    baseURL: 'https://automationteststore.com/'
  }
This allows tests to use relative navigation instead of hardcoding full URLs. For example:
await page.goto('/')Playwright automatically resolves this using the configured baseURL, keeping the test code clean, readable, and maintainable.
Simplified Test Approach:
For this guide, we intentionally avoid introducing a base test class or fixture layer.
While fixtures are commonly used in larger frameworks, adding them at this stage would introduce unnecessary abstraction and distract from the core objective of this guide – demonstrating how Cursor generates automation layers.
Instead, the test will:
- Navigate directly using page.goto(‘/’)
- Instantiate Page Objects explicitly
- Assert page headings after each navigation or major action
- Execute the flow step by step
This keeps the test simple, transparent, and aligned with the architecture demonstrated so far.
Final Flow Before Test Generation:
With these refinements in place, the complete flow becomes:
HomePage → LoginPage → RegisterPage → AccountCreatedPage
At this point, the automation framework is fully prepared to execute the registration flow end-to-end with proper navigation handling and validation.
We can now move on to generating the test specification using Cursor.
Cursor Generates the Test Spec
The Prompt for the Test Spec
Cursor Prompt:
👤 Role
You are a Senior QA Automation Architect specialising in Playwright + TypeScript automation frameworks.


Generate a production-ready Playwright test file in TypeScript using the inputs provided below.

━━━━━━━━━━━━━━━━━━━━━━━━━━━━━━━━
🎯 Objective
━━━━━━━━━━━━━━━━━━━━━━━━━━━━━━━━
- Generate a clean, maintainable, and deterministic test
- Follow layered architecture: Test → Page → DataFactory → DataObject
- Save the test file inside the /tests folder

━━━━━━━━━━━━━━━━━━━━━━━━━━━━━━━━
🏗️ Architecture Guidelines
━━━━━━━━━━━━━━━━━━━━━━━━━━━━━━━━
- Follow Page Object Model strictly
- Use only provided components:
  - DTO and Data Factory (if provided)
  - Page Objects (mandatory)
- Do not hardcode test data
- Do not use selectors inside the test
- Keep business logic out of the test

━━━━━━━━━━━━━━━━━━━━━━━━━━━━━━━━
📌 Test Structure
━━━━━━━━━━━━━━━━━━━━━━━━━━━━━━━━
- Use test.describe with a single test case
- Initialize all Page Objects and test data at the top
- Keep test.step blocks focused on execution + validation

━━━━━━━━━━━━━━━━━━━━━━━━━━━━━━━━
📌 Data Handling
━━━━━━━━━━━━━━━━━━━━━━━━━━━━━━━━
- If Data Factory is provided:
  - Initialize data once at the start:
    const <featureName>Data: DTO = new DataFactory().getData()
- Do not modify DTO inside the test

━━━━━━━━━━━━━━━━━━━━━━━━━━━━━━━━
📌 Step Design
━━━━━━━━━━━━━━━━━━━━━━━━━━━━━━━━
- Group actions into meaningful steps based on user intent
- Each step should represent a complete interaction (action + validation)
- Avoid splitting actions and their validations unnecessarily

━━━━━━━━━━━━━━━━━━━━━━━━━━━━━━━━
📌 Navigation
━━━━━━━━━━━━━━━━━━━━━━━━━━━━━━━━
- Start with: await page.goto('/')
- Use baseURL from config
- Perform navigation only via Page Objects

━━━━━━━━━━━━━━━━━━━━━━━━━━━━━━━━
📌 Assertions (Intelligent & Deterministic)
━━━━━━━━━━━━━━━━━━━━━━━━━━━━━━━━
- Add assertions after each meaningful action
- Use Page Object methods for validation

- Choose assertion matcher based on context:
  - Exact expected value → use toBe
  - Partial match → use toContain
  - Pattern-based → use toMatch only if necessary

- Prefer strict and deterministic assertions when expected values are known
- Avoid weak validations (length checks, truthy checks, etc.)

- Use direct assertions when possible:
  expect(await pageObject.method()).<matcher>('EXPECTED VALUE')

━━━━━━━━━━━━━━━━━━━━━━━━━━━━━━━━
📌 Code Quality
━━━━━━━━━━━━━━━━━━━━━━━━━━━━━━━━
- Keep code clean and readable
- Avoid unnecessary variables
- Use consistent naming
- Ensure imports are correct
- Follow standard Playwright + TypeScript practices

━━━━━━━━━━━━━━━━━━━━━━━━━━━━━━━━
📥 Inputs
━━━━━━━━━━━━━━━━━━━━━━━━━━━━━━━━

Scenario:
<Test Scenario>

Test Flow:
<Test steps>

Technical Inputs:
- Data Object: <DTO Path or Not Provided>
- Data Factory: <Data Factory Path or Not Provided>
- Page Objects:
  <List all Page Object paths>

━━━━━━━━━━━━━━━━━━━━━━━━━━━━━━━━
📤 Output
━━━━━━━━━━━━━━━━━━━━━━━━━━━━━━━━
- Generate a complete Playwright test file
- Save it inside the /tests folder
- File name should match the scenario (e.g., registration.spec.ts)
- Output ONLY TypeScript code
- No explanations

Input:

Scenario - Verify user can register successfully with valid user details.

Test Flow
- Navigate to the site
- Click on "Login or register" link in header
- Click on "Continue" button under "I am a new customer" section.
- Fill the create account form and click on "Continue" button
- Verify account is created successfully.

Technical Inputs
- DataObject - @dataObject/Register.ts
- DataFactory - @dataFactory/RegisterDataFactory.ts
- PageObject - @pages/AccountCreatedPage.ts @pages/HomePage.ts @pages/LoginPage.ts @pages/RegisterPage.ts
Cursor’s Output – registration.spec.ts
Cursor Output:
Cursor initially generated the test based on the provided prompt. During execution, it identified minor issues and automatically refined the test. In some cases, it may also update related Page Objects to align with the application behaviour.
The final version below reflects the stabilised test output after this process. This ensures that the output reflects a realistic, executable version of the test rather than just the initially generated code.
import { test, expect } from '@playwright/test'
import RegisterDataFactory from 'dataFactory/RegisterDataFactory'
import { Register } from 'dataObject/Register'
import AccountCreatedPage from 'pages/AccountCreatedPage'
import HomePage from 'pages/HomePage'
import LoginPage from 'pages/LoginPage'
import RegisterPage from 'pages/RegisterPage'


test.describe('Verify user can register successfully with valid user details.', () => {
  test('User registration completes successfully', async ({ page }) => {
    const registrationData: Register = new RegisterDataFactory().getData()

    const homePage = new HomePage(page)
    const loginPage = new LoginPage(page)
    const registerPage = new RegisterPage(page)
    const accountCreatedPage = new AccountCreatedPage(page)

    await test.step('Navigate to site and open Login/Register', async () => {
      await page.goto('/')
      await homePage.clickOnLoginOrRegisterLink()

      expect((await loginPage.getLoginPageHeadingText()).trim().toUpperCase()).toBe(
        'ACCOUNT LOGIN'
      )
    })

    await test.step('Continue as new customer and land on Create Account page', async () => {
      await loginPage.clickOnContinueButton()
      expect((await registerPage.getPageHeadingText()).trim().toUpperCase()).toBe(
        'CREATE ACCOUNT'
      )
    })

    await test.step('Create account with valid user details', async () => {
      await registerPage.createAccount(registrationData)

      expect(
        (await accountCreatedPage.getAccountCreatedPageHeadingText())
          .trim()
          .toUpperCase()
      ).toContain('YOUR ACCOUNT HAS BEEN CREATED')
    })
  })
})
The generated test closely follows the architectural guidelines defined in the prompt. It is clean, readable, and structured around meaningful user interactions using test.step.
All interactions are routed through Page Objects, and test data is sourced from the Data Factory, ensuring proper separation of concerns. Assertions are placed after key actions and validate expected outcomes deterministically.
The final output demonstrates that with a well-defined prompt, Cursor can generate tests that are not only functional but also aligned with real-world automation practices.
Executing the Test and Observing Results
Once the test is generated, the next step is to execute it and observe how it behaves in a real environment.
Cursor integrates seamlessly with Playwright, allowing tests to be executed directly from the editor without additional setup. This makes it easy to validate the generated test and understand its behaviour.
Running the Test from the Cursor
The test can be executed directly from the Cursor terminal using the standard Playwright command:
npx playwright testSince the base URL is already configured, the test navigates to the application and executes the full registration flow without requiring any additional configuration.
Observing the Passing Test Output
On execution, the test completes successfully and is marked as passed.
The terminal output provides a clear summary of:
- Test execution status
- Execution time
- Number of tests passed
This confirms that the generated test is functionally valid and able to execute the full flow end-to-end.
Exploring Playwright UI Mode
For a more interactive experience, Playwright’s UI mode can be used:
npx playwright test --uiThis allows you to:
- Visually step through the test
- Observe each action as it happens
- Debug issues more effectively
UI mode is especially useful when validating complex flows or understanding how the test interacts with the application.
Analysing the HTML Report
Playwright also generates an HTML report after execution:
npx playwright show-reportThe report provides:
- A detailed breakdown of each test step
- Execution timelines
- Screenshots and logs (if configured)
This helps in understanding test behaviour and diagnosing issues more efficiently.
Debugging Failures with Cursor Chat
If a test fails, Cursor provides an additional advantage through its integrated AI assistance.
You can:
- Share the failure output directly with Cursor Chat
- Ask for fixes or improvements
- Refine the test or Page Object based on suggestions
This makes debugging faster and reduces the effort required to identify and fix issues.
AI-Assisted Execution and Stabilisation
Once the test was generated, Cursor automatically executed it without any additional setup.
During execution, it detected failures and applied fixes to stabilise the test. These fixes included adjustments to assertions and improvements to locator handling within the Page Object. The cursor then re-ran the test until it passed.
Understanding Auto-Healing:
Cursor’s auto-healing is reactive, not proactive. It only activates when a failure is detected during execution.
It is particularly effective at resolving:
- Locator mismatches
- Minor assertion inconsistencies
- Synchronisation or execution issues
In this example, Cursor not only refined the test but also updated the Page Object to better align with the actual UI behaviour. This demonstrates its ability to reason across different layers of the automation framework.
Where Auto-Healing Stops:
While Cursor can make a test pass, it does not optimise for readability, intent, or long-term maintainability.
For example, the stabilised test may include defensive patterns such as:
- Additional transformations in assertions
- Generic or less descriptive naming conventions
These approaches ensure successful execution but may not align with preferred coding standards, readability, or long-term maintainability.
When Manual Intervention Is Required:
While Cursor can automatically stabilise many tests, auto-healing is not guaranteed in every scenario.
Manual refinement may be required when:
- The issue is related to business logic rather than technical failure
- Assertions are logically incorrect but still pass
- Page Object design or naming needs improvement
- Required data conditions are not satisfied by the Data Factory
In such cases, the engineer must either:
- Refine the code manually, or
- Guide Cursor with a more specific prompt to apply the necessary changes
Key Takeaway:
Cursor is highly effective at generating and stabilising tests, but its primary goal is to make the test pass – not to optimise design.
AI accelerates test creation and reduces initial effort, but producing high-quality, maintainable tests still requires thoughtful engineering judgement.
Advanced Cursor Workflows for Scalable Test Automation
Once the foundational layers – Data Object, Data Factory, Page Object, and Test – are in place, Cursor becomes significantly more powerful. At this stage, it can be used not just for generation, but for evolving and maintaining the automation framework.
These advanced workflows demonstrate how Cursor can operate across multiple layers of the codebase and assist in real-world scenarios where changes are rarely isolated to a single file.
@Codebase – Querying Across DO, DF, and POM
Cursor’s @Codebase feature allows you to query and reason across multiple files simultaneously. This is particularly useful in layered automation frameworks where changes often span Data Objects, Data Factories, and Page Objects.
Instead of manually tracing how a field flows through the system, you can ask Cursor questions like:
- Where is a specific field used across the framework?
- How is a particular input handled from DTO to UI interaction?
- Which Page Object methods depend on a given data attribute?
This enables faster impact analysis and reduces the effort required to understand dependencies between layers.
It is especially helpful when:
- Adding new fields to an existing form
- Debugging inconsistencies between data and UI
- Refactoring or renaming fields across the framework
Multi-File Editing – Adding a Field Across Layers
In real-world automation, adding a new field is rarely limited to a single file. It typically requires updates across:
- Data Object (DTO)
- Data Factory
- Page Object
- Possibly the test itself
Cursor can handle this as a single workflow.
For example, if a new field needs to be added to the registration form, you can prompt Cursor to:
- Update the DTO with the new field
- Add data generation logic in the Data Factory
- Update the Page Object to interact with the new UI element
Instead of making changes file by file, Cursor applies consistent updates across all relevant layers.
This significantly reduces:
- Manual effort
- Risk of missing updates
- Inconsistencies between layers
Inline Chat for Targeted Fixes
While @Codebase is useful for broader changes, Inline Chat is ideal for precise, localised fixes.
You can select a specific section of code and ask Cursor to:
- Improve locator strategies
- Refactor method names for clarity
- Fix assertion logic
- Simplify or optimise implementation
This allows you to make controlled improvements without affecting the rest of the codebase.
Inline Chat is particularly effective when:
- A specific locator is unstable
- A method name does not clearly reflect its intent
- Small refinements are needed after auto-generation
Limitations
While Cursor is highly effective in accelerating test automation development, it is not without limitations. Understanding these constraints is essential to using it effectively and avoiding incorrect assumptions about its capabilities.
Prompt Precision Matters
The quality of Cursor’s output is directly dependent on the clarity and structure of the prompt.
Ambiguous or incomplete prompts can lead to:
- Incorrect assumptions about application behaviour
- Missing fields or validations
- Inconsistent naming or structure
Cursor does not inherently “know” your architecture – it follows the instructions provided. Without clear guidance, the generated output may deviate from expected standards.
This reinforces a key principle: Well-structured prompts produce predictable and high-quality results.
Context Window and @File References
Cursor operates within a limited context window. It does not automatically understand the entire codebase unless relevant files are explicitly referenced.
Without proper context:
- It may miss dependencies between layers
- It may generate duplicate or conflicting logic
- It may not align with existing patterns
Using features like @file and @codebase ensures that Cursor has access to the necessary context to generate accurate and consistent code.
Hallucinations in Playwright APIs
Like other AI tools, Cursor can occasionally generate incorrect or non-existent Playwright APIs.
Examples may include:
- Invalid method names
- Incorrect locator strategies
- Misuse of Playwright functions
These issues are usually subtle and may not be immediately obvious. It is important to review generated code carefully and validate it against official documentation or existing framework patterns.
Pricing Considerations
Cursor is available on both free and paid plans. The free plan is sufficient for evaluating the tool and working on smaller projects, while paid plans provide higher usage limits, access to more capable models, and team-level features such as centralised billing and administrative controls.
For teams adopting Cursor at scale, pricing should be evaluated in relation to productivity gains – particularly in automation workflows where generation, refactoring, and debugging tasks are performed frequently.
Costs can scale with usage and team size, so it is important to align adoption with expected benefits. The latest plan details and limits can be reviewed on Cursor’s official website.
Ultimately, the key consideration is not just cost, but how Cursor fits into the broader engineering workflow – whether it serves as a productivity enhancer or becomes a core part of the development process.
Best Practices for Using Cursor in Test Automation
To use Cursor effectively in test automation, it is important to go beyond basic prompt usage and follow a structured, engineering-driven approach. The following best practices help ensure that generated code is reliable, maintainable, and aligned with real-world automation standards.
Always Review AI-Generated Locators
Even when Cursor generates working locators, they should always be reviewed before accepting.
AI-generated locators may:
- Be overly generic
- Rely on unstable attributes
- Not aligned with long-term maintainability
Where possible, prefer:
- Stable attributes (IDs, names)
- Explicit selectors over implicit assumptions
- Consistent locator strategies across the framework
Treat locator review as a mandatory step, not an optional one.
Use Structured, Architecture-Aware Prompts
Cursor performs best when prompts clearly define the expected architecture and constraints.
Instead of asking for generic test generation, specify:
- Page Object Model usage
- Data Object and Data Factory patterns
- Naming conventions and coding standards
A well-structured prompt ensures:
- Consistent output
- Better alignment with your framework
- Reduced need for rework
Generate in Layer Order – Never Skip Ahead
Automation layers should be generated in a logical sequence:
Data Object → Data Factory → Page Object → Test
Skipping layers or generating them out of order can lead to:
- Missing dependencies
- Inconsistent implementations
- Increased rework
By building each layer step by step, you provide Cursor with the necessary context to generate accurate and cohesive code.
Run TypeScript Validation (tsc –noEmit) After Every Acceptance
After accepting the generated code, always validate it using:
tsc --noEmitThis helps identify:
- Type mismatches
- Missing imports
- Invalid references across files
TypeScript acts as a safety net and can catch issues that are not immediately visible during generation.
Running validation early prevents errors from propagating across layers.
Key Takeaways
- The quality of generated tests is directly driven by the quality and structure of the prompt.
- Cursor performs best when guided by a clear architecture, such as Data Object, Data Factory, and Page Object Model.
- Generating automation in layer order ensures consistency and reduces rework.
- AI-assisted auto-healing improves test stability, but it focuses on execution – not design or readability.
- Context matters – providing the right files and references significantly improves output accuracy.
- TypeScript validation acts as a critical safety net for catching issues early.
- Cursor accelerates development, but it does not replace engineering judgment.
Conclusion: What We Built and What It Means
In this guide, we built a complete end-to-end test automation flow using Cursor – starting from a single prompt and progressing through Data Object, Data Factory, Page Object, and finally a fully executable test.
Each layer was generated with clear structure and intent, resulting in a cohesive automation framework that mirrors real-world practices. The test was not only generated but also executed and stabilised, demonstrating how Cursor can handle both creation and refinement within the same workflow.
This highlights an important shift in how automation can be developed – from manually writing each layer to guiding AI with well-defined constraints and architecture.
A key takeaway from this process is that prompting is not just about asking for code – it is about defining structure, constraints, and expectations.
When prompts are:
- Clear
- Architecture-aware
- Context-rich
Cursor can generate outputs that align closely with production standards.
As automation frameworks grow, this approach becomes even more valuable. Instead of scaling effort linearly with code size, engineers can focus on defining patterns and letting AI handle repetitive implementation work.
Witness how our meticulous approach and cutting-edge solutions elevated quality and performance to new heights. Begin your journey into the world of software testing excellence. To know more refer to Tools & Technologies & QA Services.
If you would like to learn more about the awesome services we provide, be sure to reach out.
Happy Testing 🙂


